yeah the ducars usally have a 14mm pin but the best way in every case is to measure... carn't stress it enough... measure.... & not with a ruler or tape..
& TB big bore kit is for honda's
Phew, normally i use my tally ho packs.. they 'rule' up to 7cm.....

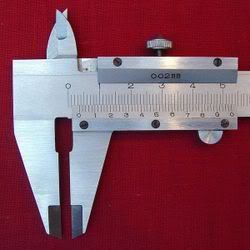
A vernier scale lets one read more precisely from an evenly divided straight or circular measurement scale. It is fitted with a sliding secondary scale that is used to indicate where the measurement lies when it is in-between two of the marks on the main scale.
It was invented in its modern form in 1631 by the French mathematician Pierre Vernier (1580–1637). In some languages, this device is called a nonius, which is the Latin name of the Portuguese astronomer and mathematician Pedro Nunes (1492–1578) who invented the principle. Another theory is that this name is from the Latin "nona" meaning "9" and therefore "nonius" means a "ninth" of the main scale.
Verniers are common on sextants used in navigation, scientific instruments and machinists' measuring tools (all sorts, but especially calipers and micrometers) and on theodolites used in surveying.
When a measurement is taken by mechanical means using one of the above mentioned instruments, the measure is read off a finely marked data scale (the "fixed" scale, in the diagram). The measure taken will usually be between two of the smallest gradations on this scale. The indicating scale ("vernier" in the diagram) is used to provide an even finer additional level of precision without resorting to estimation.
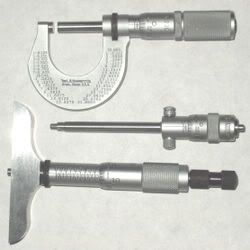
The image shows three common types of micrometers, the names are based on their application:
Outside Micrometer
Inside Micrometer
Depth Micrometer
Bore Micrometer
An outside micrometer is typically used to measure wires, spheres, shafts and blocks. An inside micrometer is commonly used to measure the diameter of holes, and a depth micrometer typically measures depths of slots and steps. The bore Micrometer is typically a three anvil head on a micrometer base used to accurately measure inside diameters.
The precision of a micrometer is achieved by a using a fine pitch screw mechanism.
An additional feature of micrometers is the inclusion of a spring-loaded ratchet thimble. Normally, one could use the mechanical advantage of the screw to force the micrometer to squeeze the material, giving an inaccurate measurement. However, by attaching a thimble that will ratchet or friction slip at a certain torque, the micrometer will not continue to advance once sufficient resistance is encountered.


