You are using an out of date browser. It may not display this or other websites correctly.
You should upgrade or use an alternative browser.
You should upgrade or use an alternative browser.
my new/used Yamaha PW50 thread
- Thread starter my67xr
- Start date
-
- Tags
- 1981 2t 2 stroke pw 32 to 1 4x4 50cc big bore carbon fibre reeds custom expansion chamber gytr handguards high comp shaved head home made muffler irc tyres kids mx leather seatcover mikuni 15mm big jets new stickers decal polished plastics ported intake premix pw50 peewee 50 scratched plastics shaved head y zinger yamaha minibike

Help Support Mini Dirt Bikes & Pit Bikes Forum:
This site may earn a commission from merchant affiliate
links, including eBay, Amazon, and others.
my67xr
Miniriders Legend and Master Spanner Spinning Mode
Rodney68
Well-Known Member
Top job Craig love the signwork mate LOL
my67xr
Miniriders Legend and Master Spanner Spinning Mode
cheers Rodney
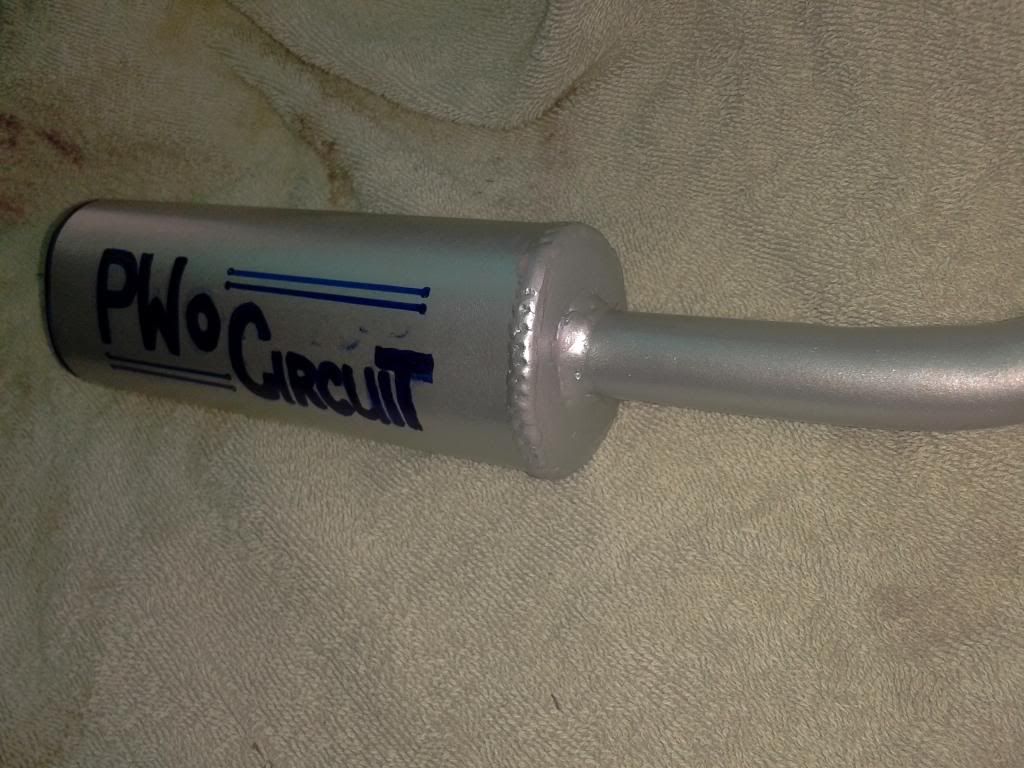
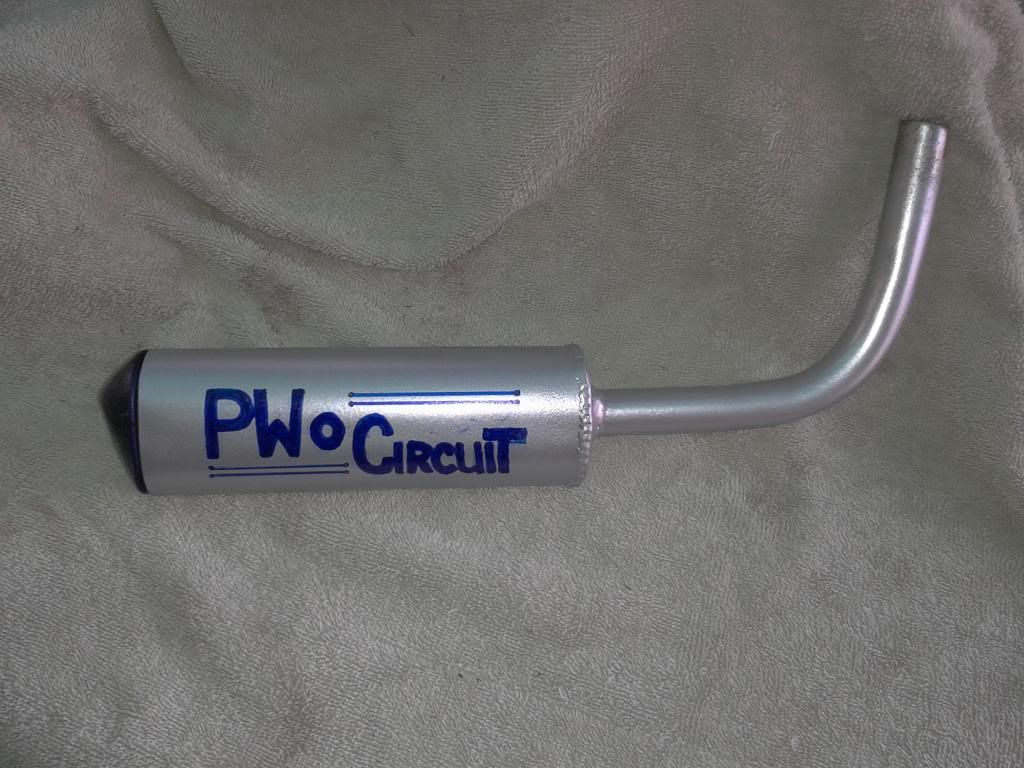
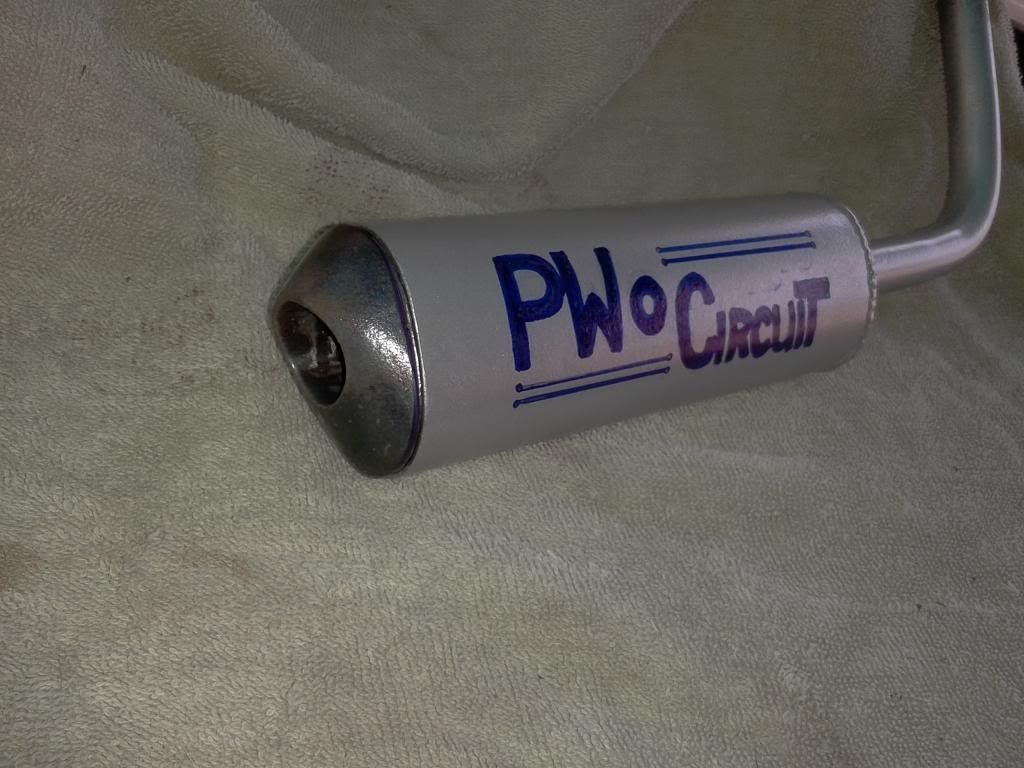
for anyonme that hasn't worked it out yet, it's a PWo Circuit, not a Pro Circuit muffler
for anyonme that hasn't worked it out yet, it's a PWo Circuit, not a Pro Circuit muffler
GooseMan
Well-Known Member
I'm betting it works better though
Hillz
WC ST Killa
im very impressed, you must have a decent workshop at your disposal

$16.92
BBB Cycling BBL-52 MiniSafe Compact Bicycle Lock for Mountain, Road and Racing Bikes
RAREWAVES-IMPORTS

$52.99
$59.99
Kids Dirt Bike Gear,Motorcycle Armor Vest Suit for Motocross ATV MTB,Elbow Knee Back Chest Protection for Skating Ski
GuguzhichenStore
my67xr
Miniriders Legend and Master Spanner Spinning Mode
Haha, thanks,
but nah, most my R&D , fabrications etc, are done on the cement out infront of my shed.
all you need is a mig, an angle grinder, bench grinder, a drill press, and plenty of scrap steel
all i need to do now is work out what to do with a 3 legged school chair ? ! ? :action-smiley-003:
but nah, most my R&D , fabrications etc, are done on the cement out infront of my shed.
all you need is a mig, an angle grinder, bench grinder, a drill press, and plenty of scrap steel
all i need to do now is work out what to do with a 3 legged school chair ? ! ? :action-smiley-003:
my67xr
Miniriders Legend and Master Spanner Spinning Mode
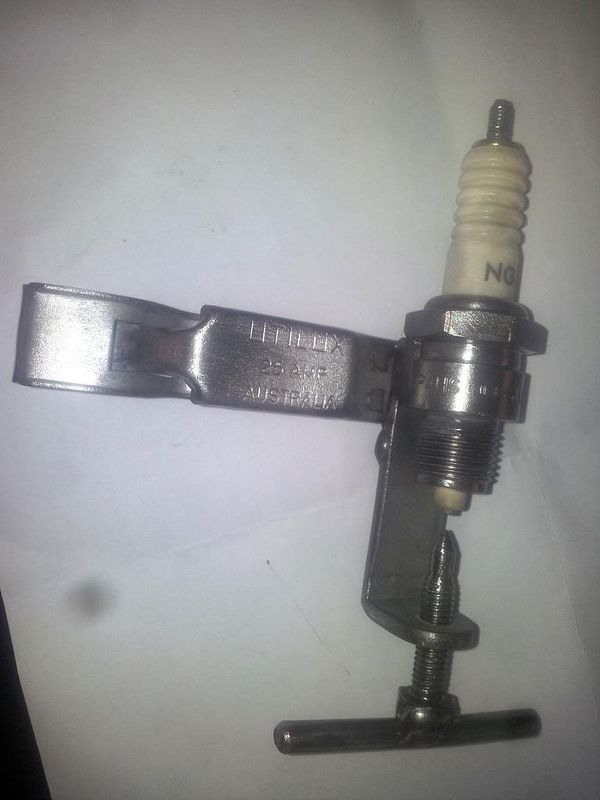
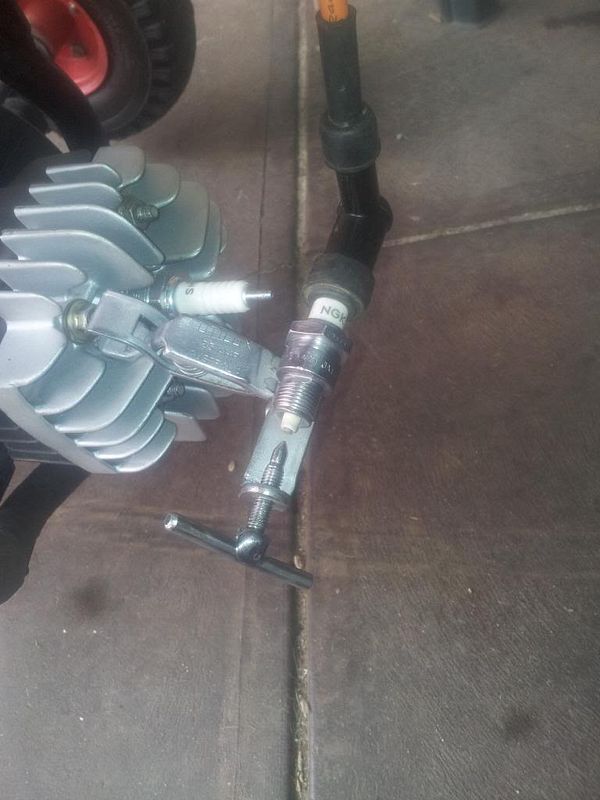
^Nice work on both accounts, that plug tester is a great idea, might not be a bad thing to paint it wihte too? would make the spark stand out clearer i would think. As for the 3 legged chair....Well i think it's best to say it's just another 3 muffler inners 
my67xr
Miniriders Legend and Master Spanner Spinning Mode
thanks timeeh,
i was thinking satin black maybe, for the spark tester?
a blue/white/yellow spark might show up better with a darker background ?
i have got my Galaxy S2 working again, after cleaning the charge port thoroughly.
so i have a couple of better pics of things i have done.
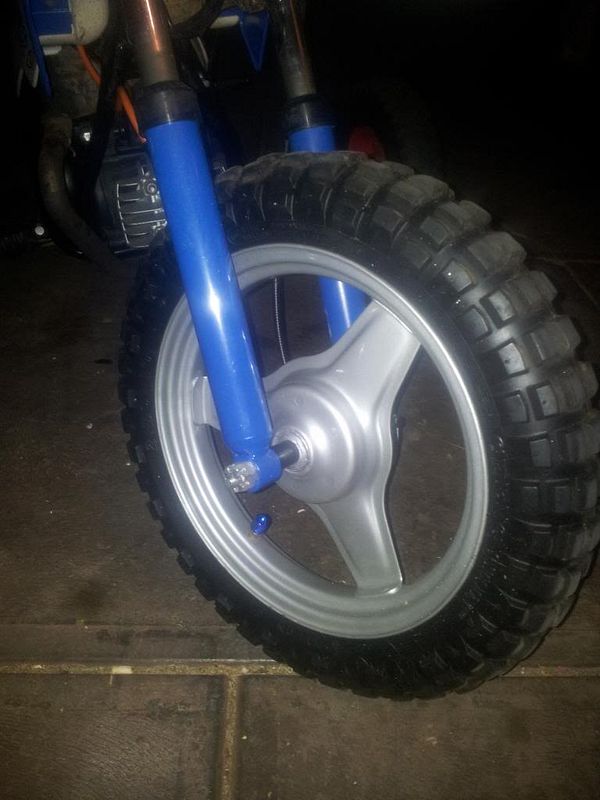
i sandblasted and resprayed the back rim, done in metallic silver, with 2K clear
and swapped the original IRC front tyre (made in 1982) onto the rear, as its starting to get a few age cracks etc.
also stripped and resprayed the r/h axle support arm.
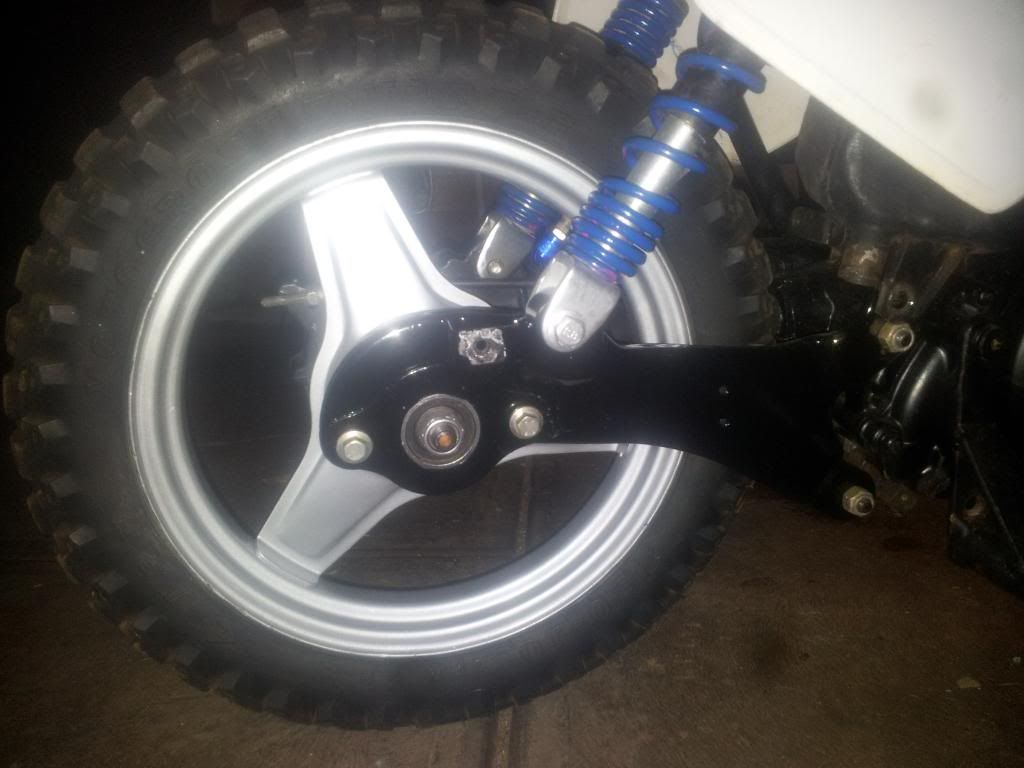
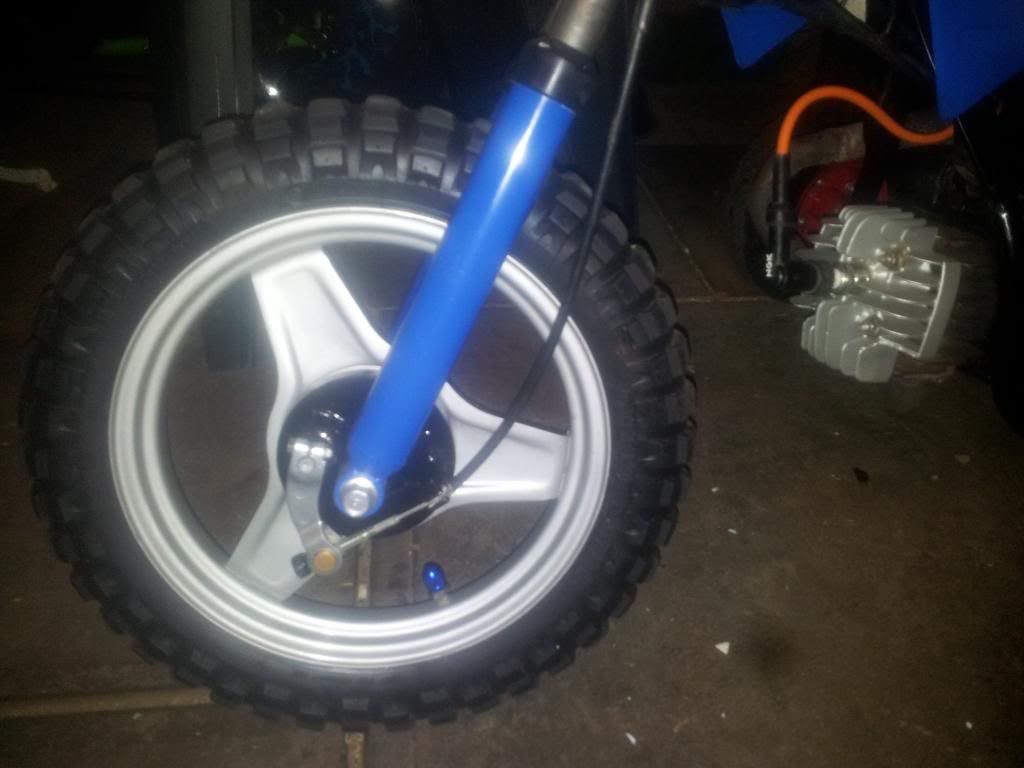
resprayed the front rim metallic silver, with 2K clear, and fitted the good used secondhand tyre
resprayed the front brake backing plate, brake arm and front forks
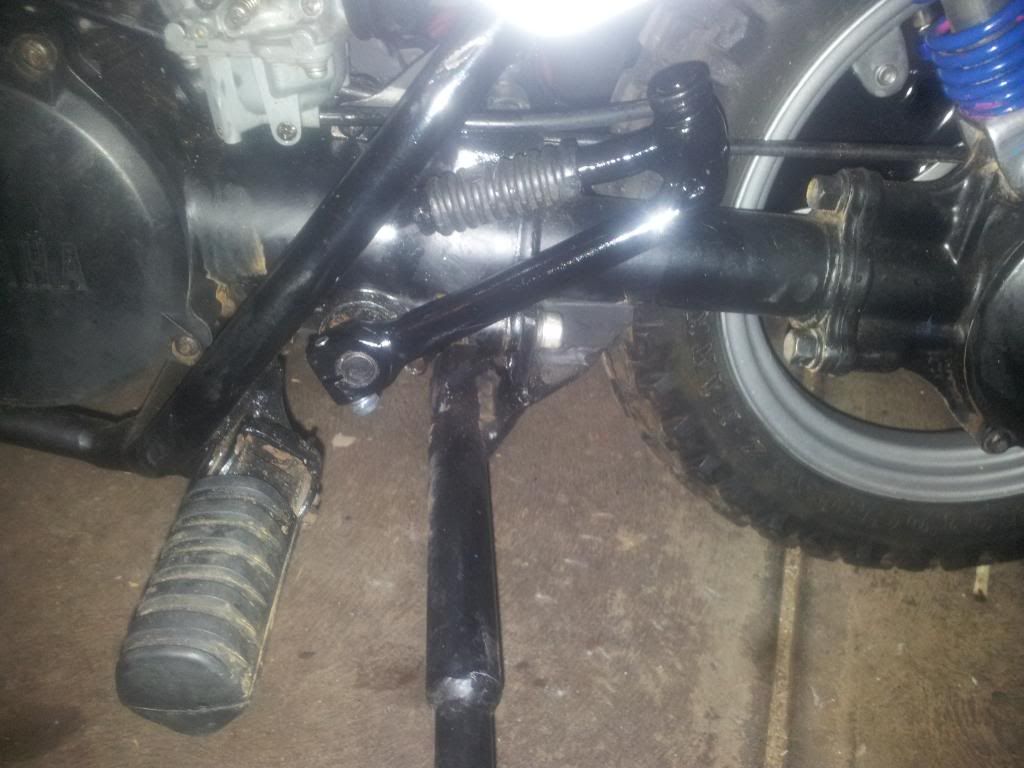
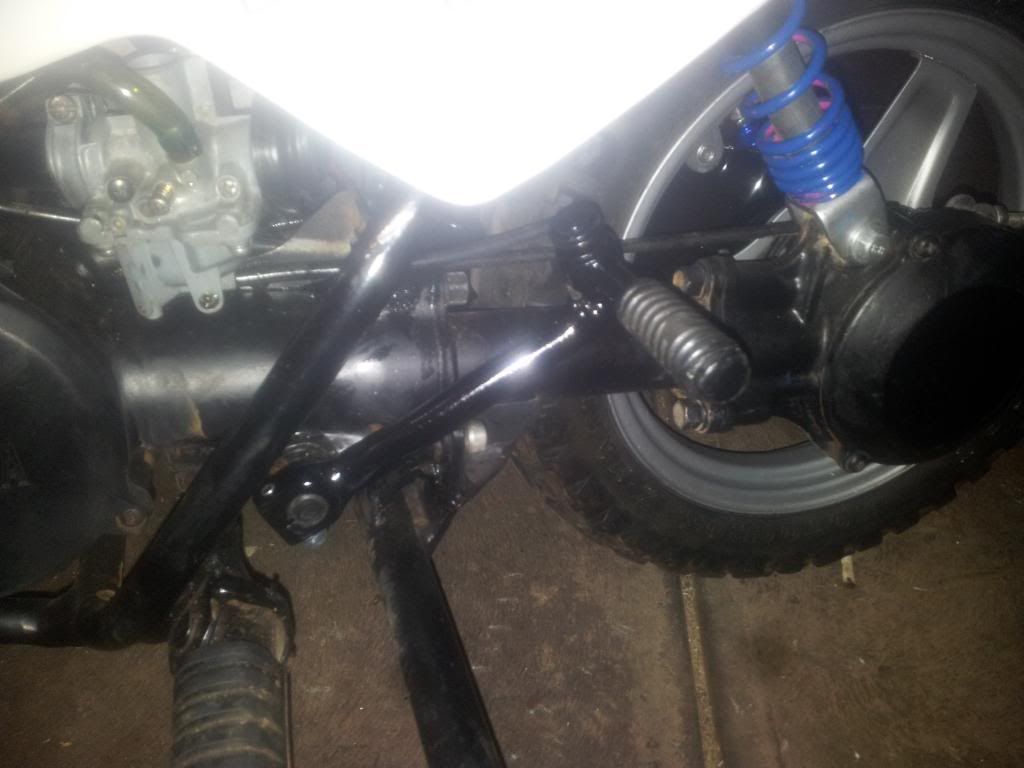
i have modified another china kickstarter, this time making it the factory OEM style
i was playing around trying to work out what to do with the choke cable today.
and i found out why the throttle was starting to feel a little loose,
it was only holding together by 3 strands of wire.
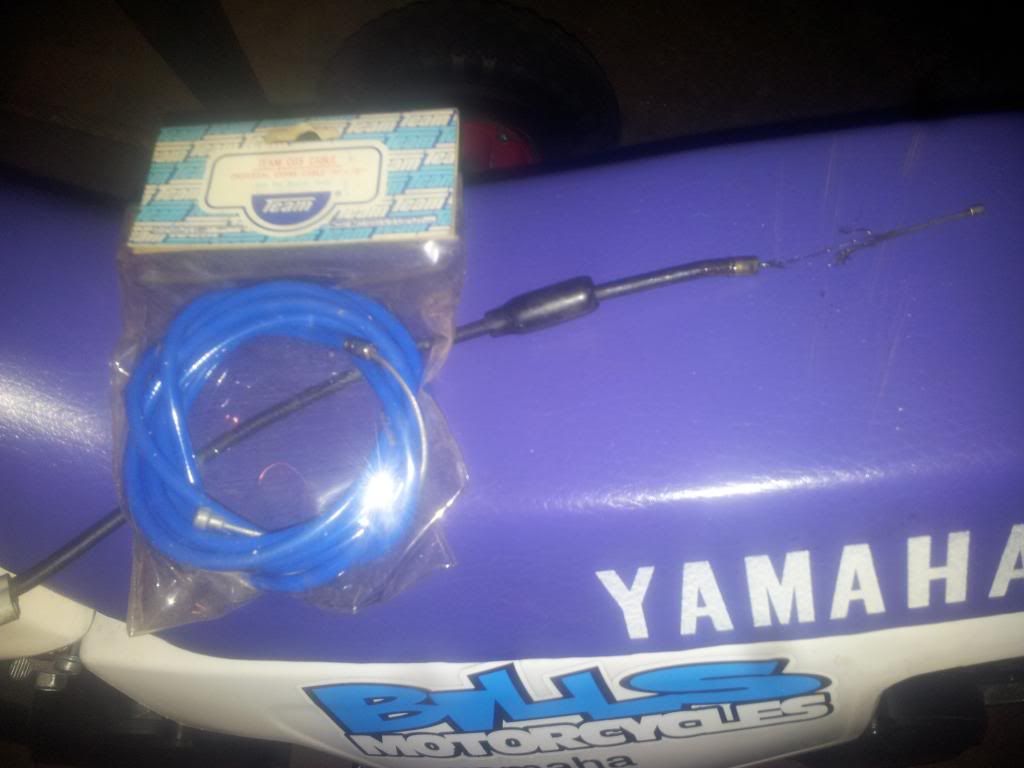
i have a nice blue NOS bmx cable i am going to use to replace it.
the original throttle cable splits into 2 cables half way down to the carby,
one going to the carby, the other to the oil pump (which has been removed from this bike)
so a new one piece cable will look a lot neater...
i was thinking satin black maybe, for the spark tester?
a blue/white/yellow spark might show up better with a darker background ?
i have got my Galaxy S2 working again, after cleaning the charge port thoroughly.
so i have a couple of better pics of things i have done.
i sandblasted and resprayed the back rim, done in metallic silver, with 2K clear
and swapped the original IRC front tyre (made in 1982) onto the rear, as its starting to get a few age cracks etc.
also stripped and resprayed the r/h axle support arm.

resprayed the front rim metallic silver, with 2K clear, and fitted the good used secondhand tyre
resprayed the front brake backing plate, brake arm and front forks


i have modified another china kickstarter, this time making it the factory OEM style


i was playing around trying to work out what to do with the choke cable today.
and i found out why the throttle was starting to feel a little loose,
it was only holding together by 3 strands of wire.
i have a nice blue NOS bmx cable i am going to use to replace it.
the original throttle cable splits into 2 cables half way down to the carby,
one going to the carby, the other to the oil pump (which has been removed from this bike)
so a new one piece cable will look a lot neater...

Last edited:
Rodney68
Well-Known Member
Top job Craig this PW is really looking smick now great workmanship mate.
my67xr
Miniriders Legend and Master Spanner Spinning Mode
the only thing is,
when taking pics of the work that i've done, you can see things that were missed,
eg; you can still see some pink paint on the inside rear of the shocker springs, and other little things that still need doing....
today i made up another throttle cable for it.
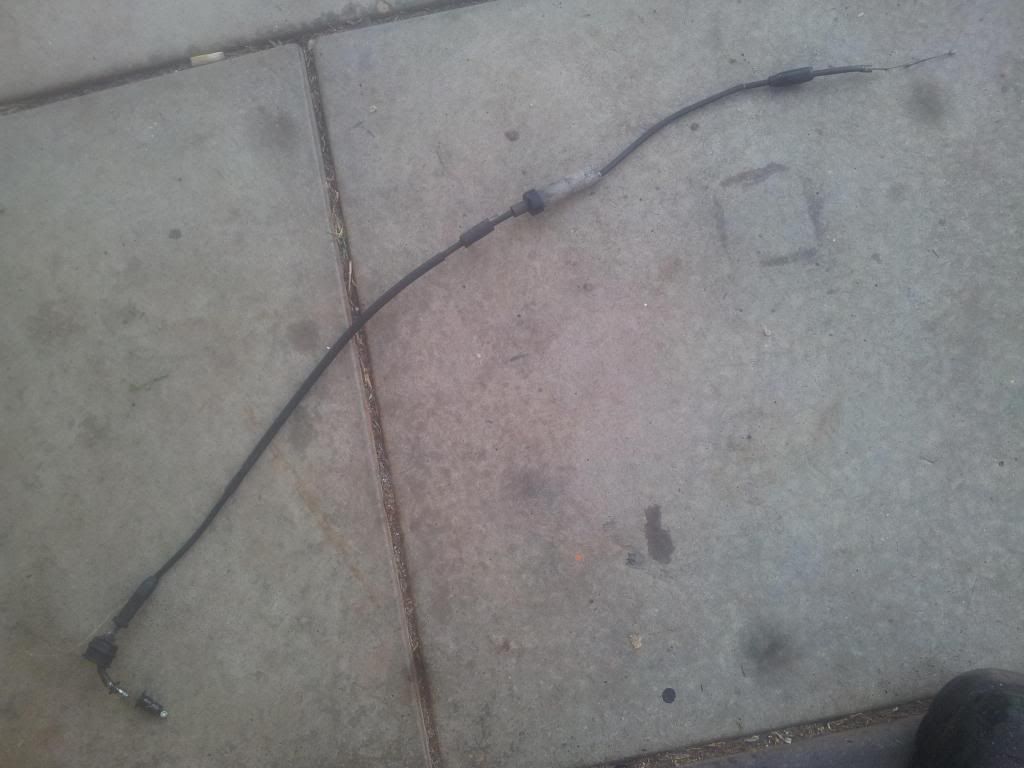
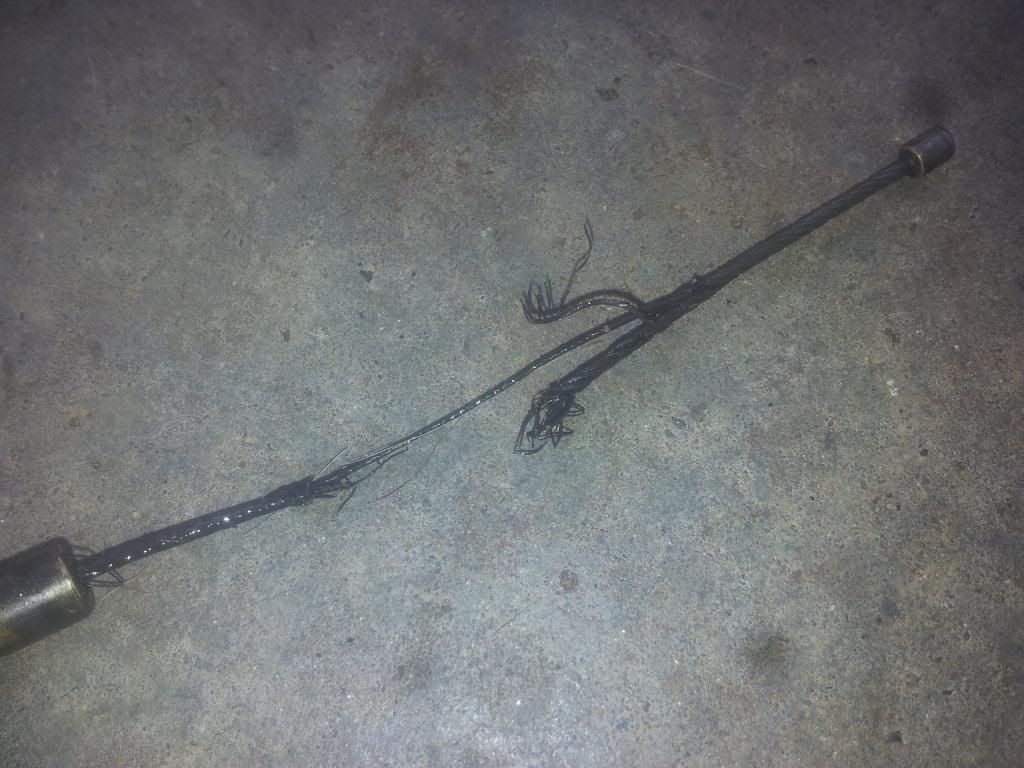
i cut the new cable outer to length,
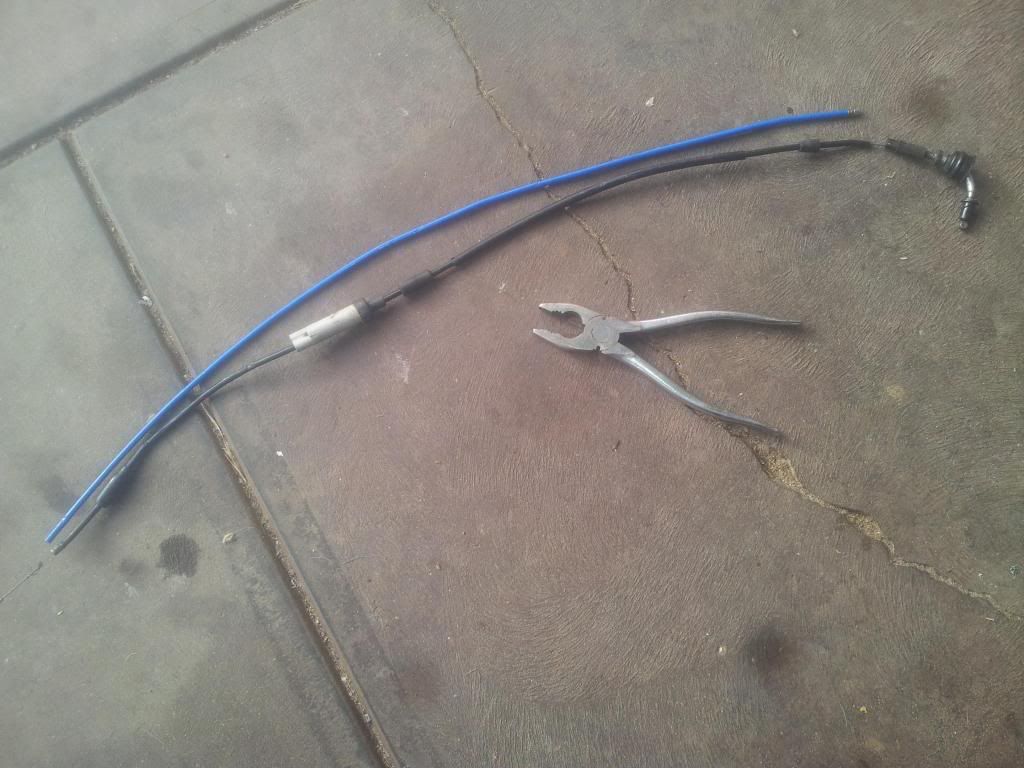
heated the old cable end with the LPG torch and removed it off the cable
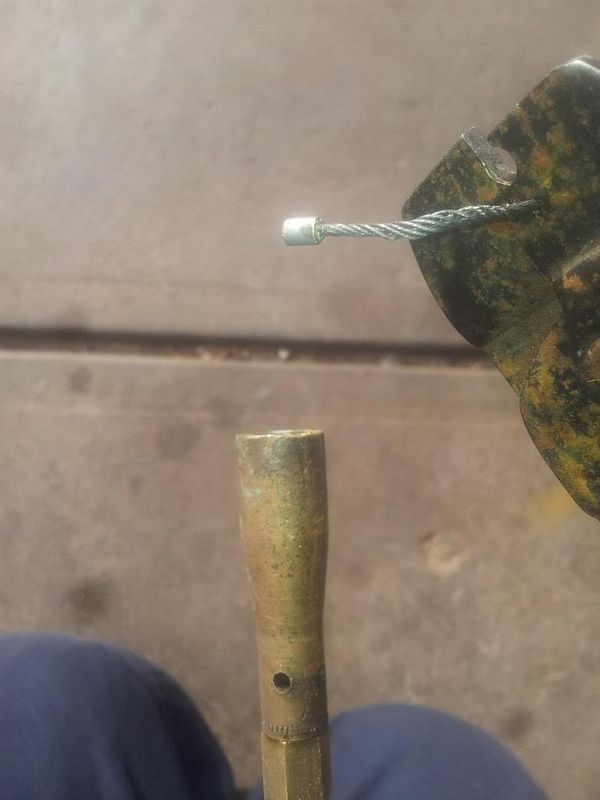
next step was to drill then file out the old cable end ready to fit it onto the new cable,
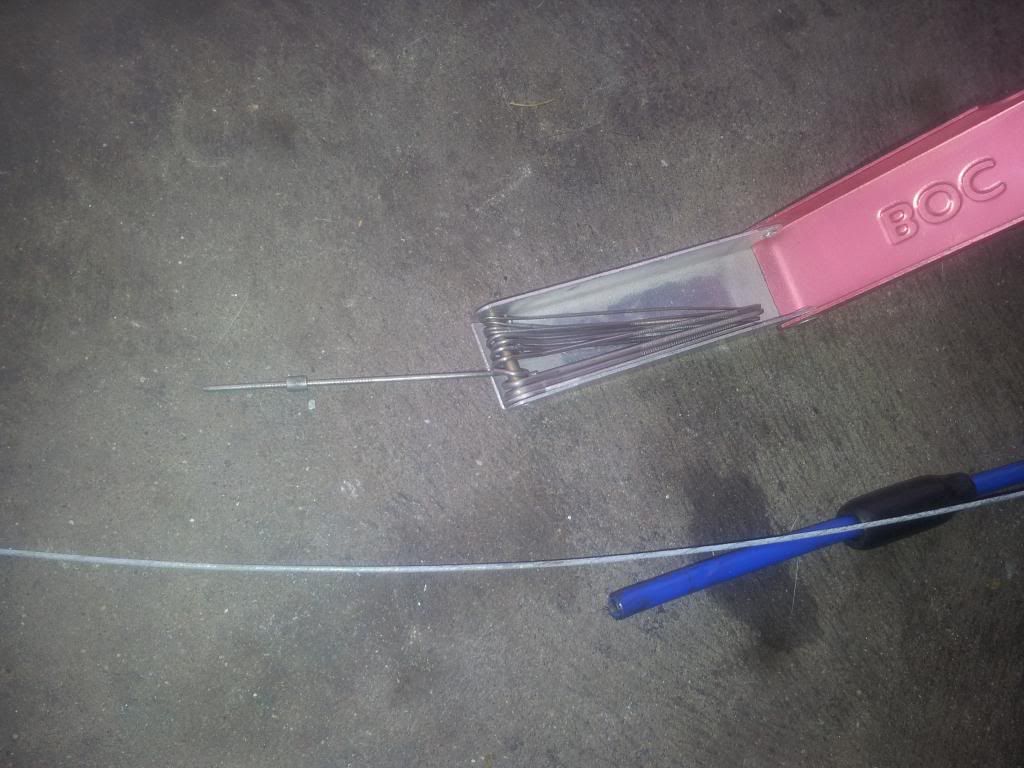
then slip it onto the new cable and solder it on,
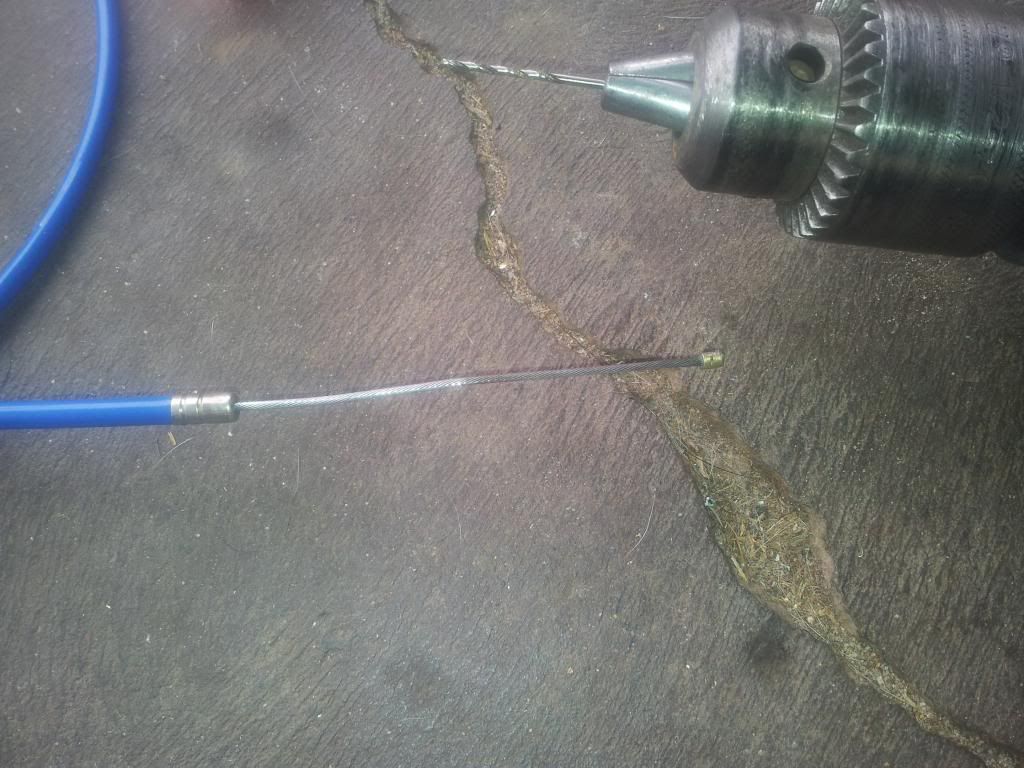
here is the cable all finished,
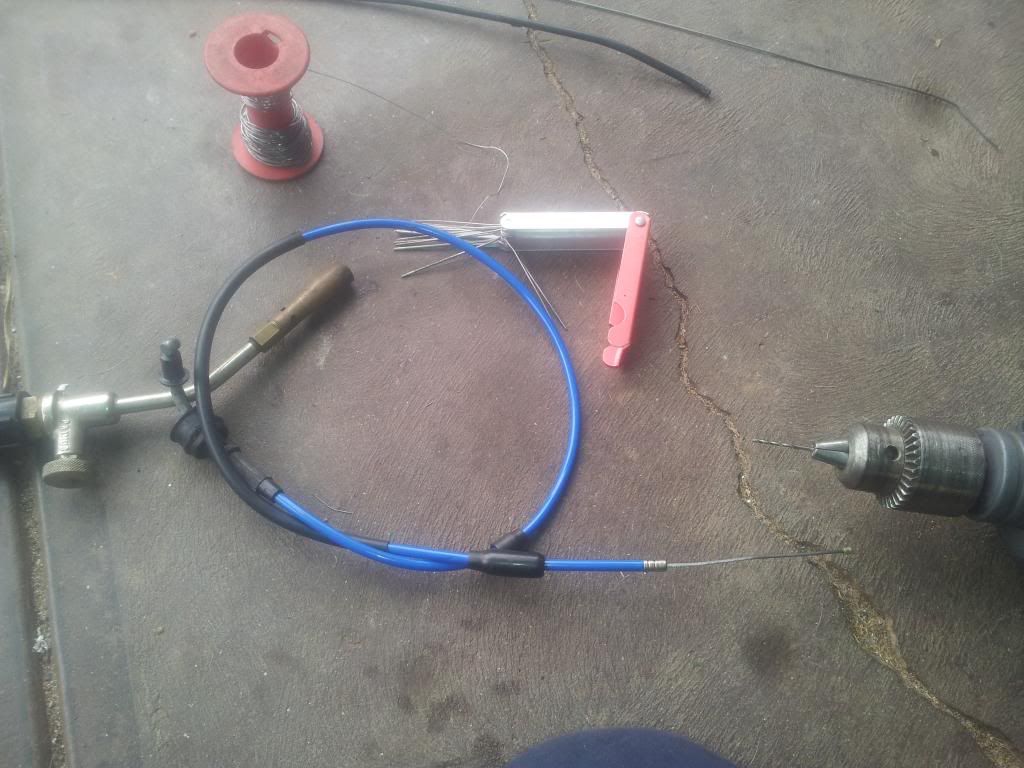
once soldered, i ran some Inox MX5 down the cable to prevent rust and help it slide,
and put it back onto the bike again.
the cable works just like the original one did when it was new.
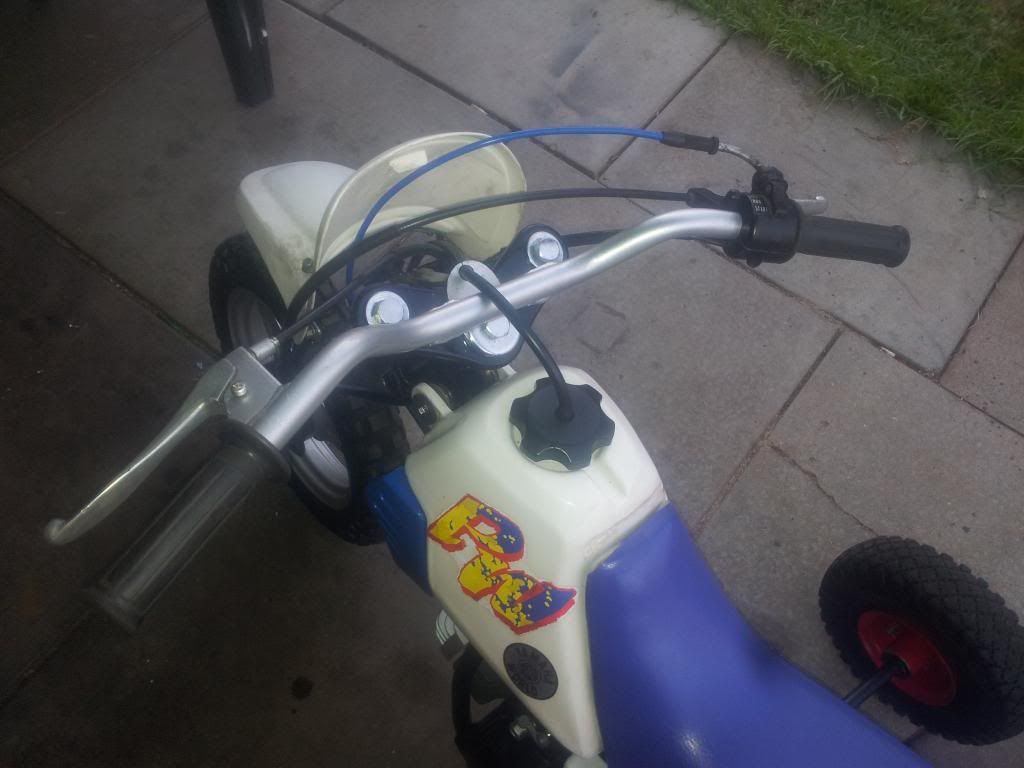
when taking pics of the work that i've done, you can see things that were missed,
eg; you can still see some pink paint on the inside rear of the shocker springs, and other little things that still need doing....
today i made up another throttle cable for it.


i cut the new cable outer to length,

heated the old cable end with the LPG torch and removed it off the cable

next step was to drill then file out the old cable end ready to fit it onto the new cable,

then slip it onto the new cable and solder it on,

here is the cable all finished,

once soldered, i ran some Inox MX5 down the cable to prevent rust and help it slide,
and put it back onto the bike again.
the cable works just like the original one did when it was new.

my67xr
Miniriders Legend and Master Spanner Spinning Mode
yeah, it was unexpected.
the carby end of the cable goes into another 90 degree bent tube, then down into the carby.
the cables must eventually wear through on the inside of the bent tube.
i think this would have been the original cable too, so 30 years is not too bad lifespan.
i could have bought a china PY50 throttle cable brand new for $25, but i've had this blue cable sitting around for years unused.
so it only cost me half an hours time to remake it into something i can use.
i wish the choke cable was this easy to make.
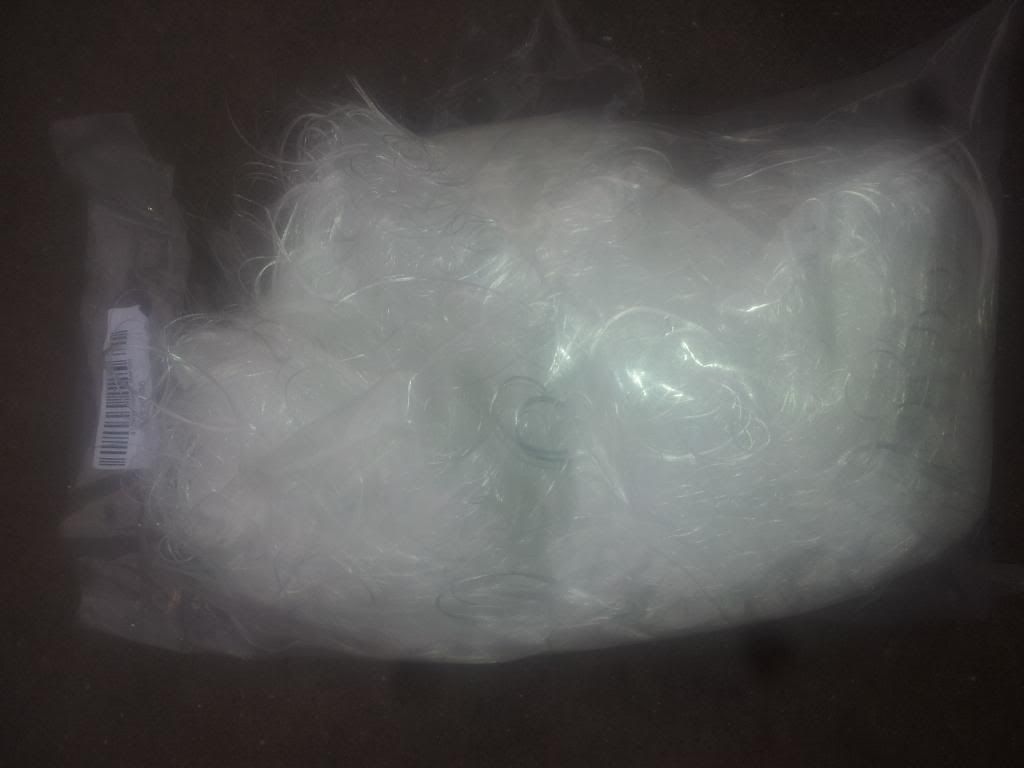
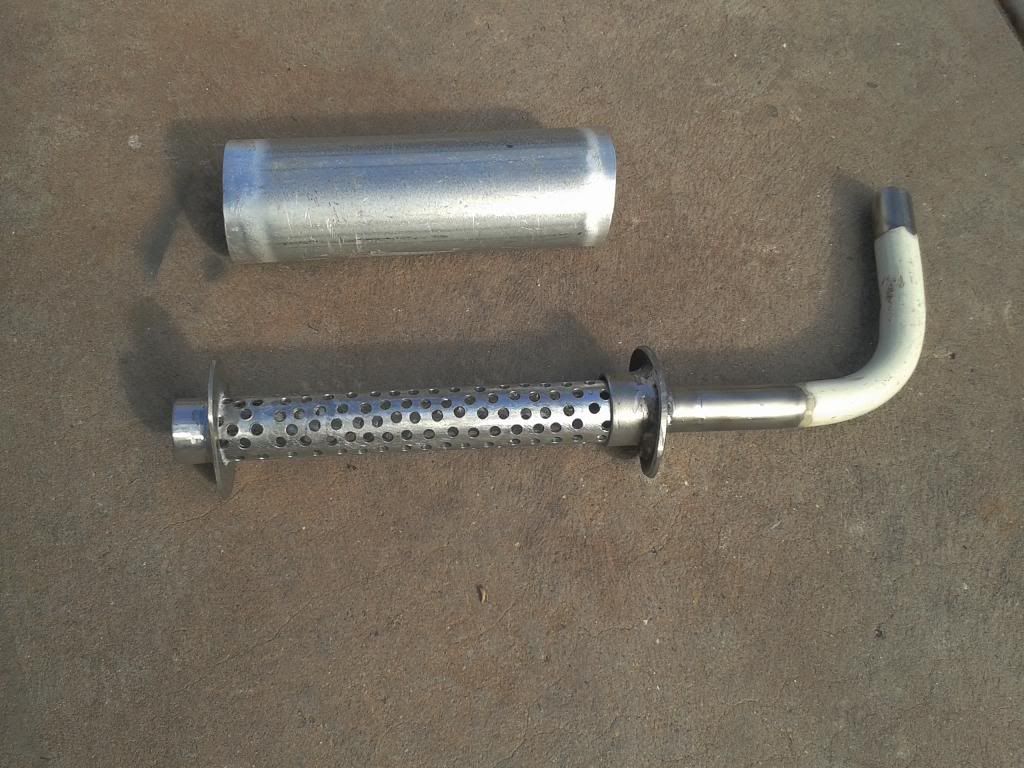
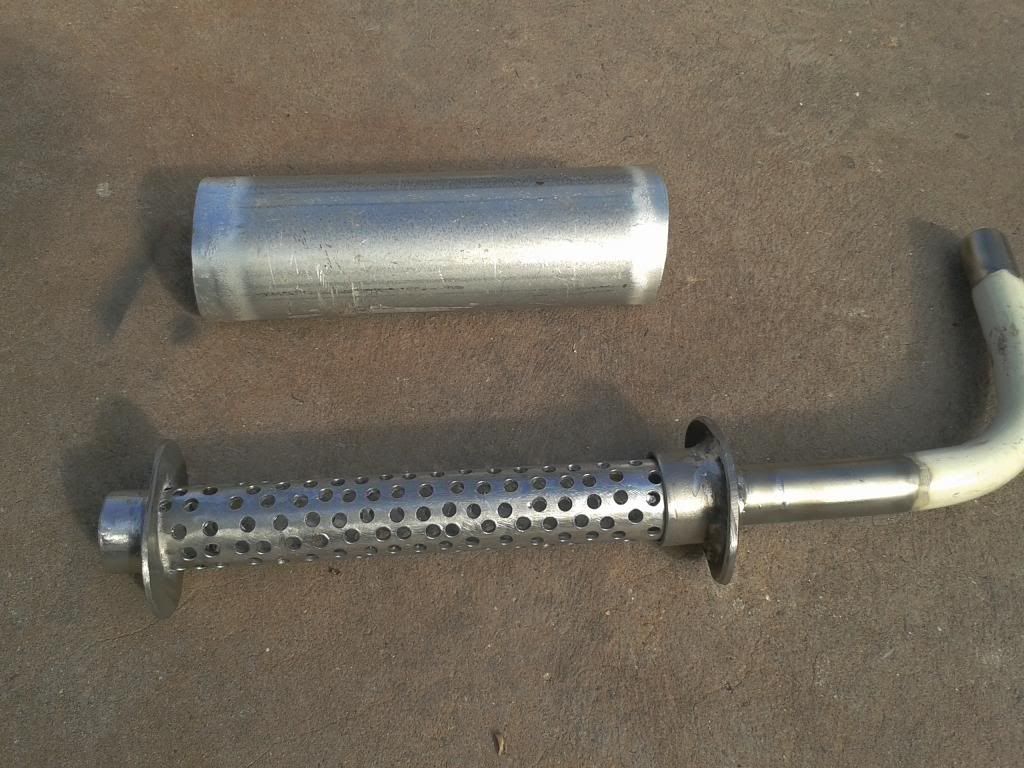
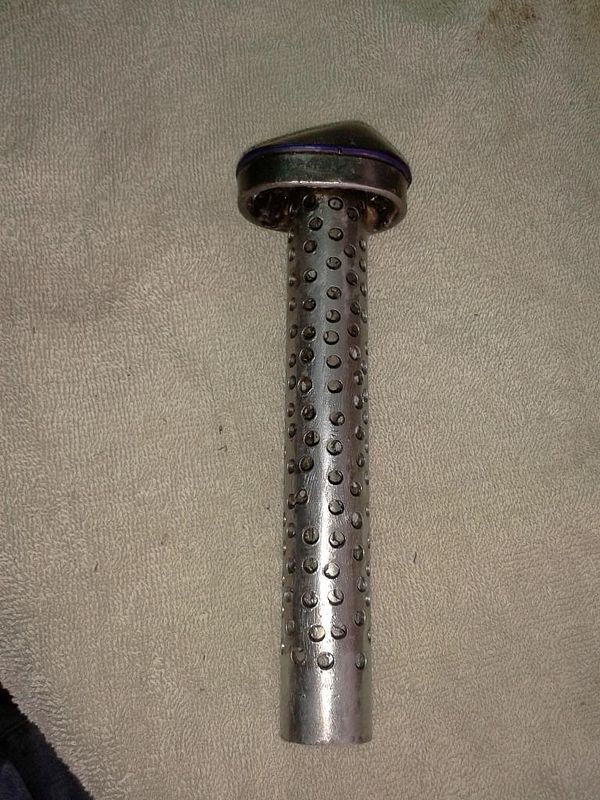
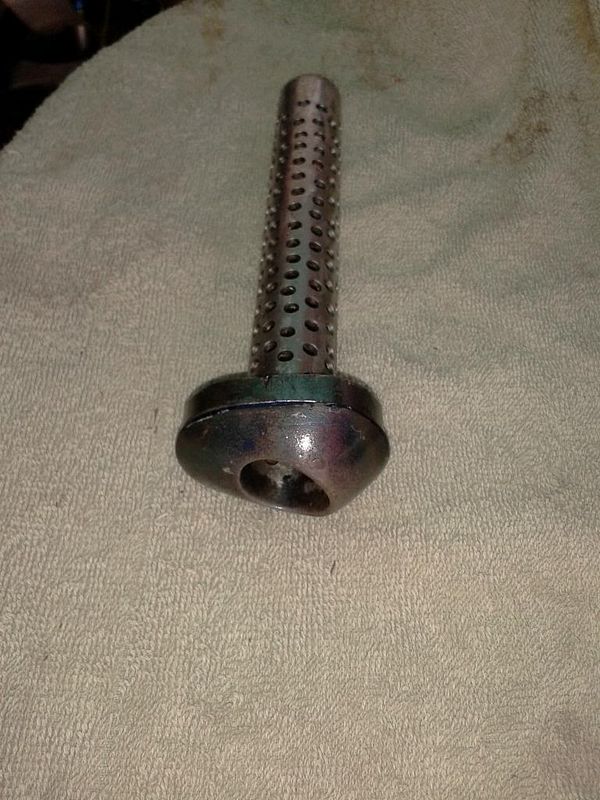
i forgot to post up earlier too, i bought some packing for the custom muffler today, and put it together.
i'll get a video of it running and post that up too.
my67xr
Miniriders Legend and Master Spanner Spinning Mode
a few new shots,
muffler with OEM style mount ,
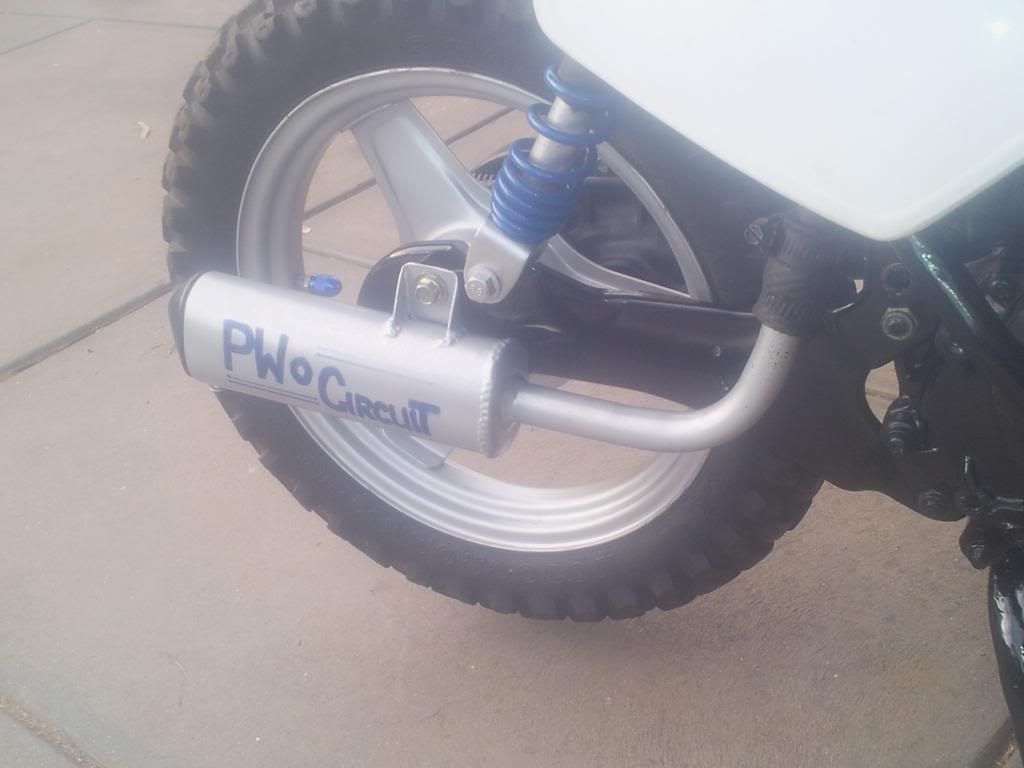
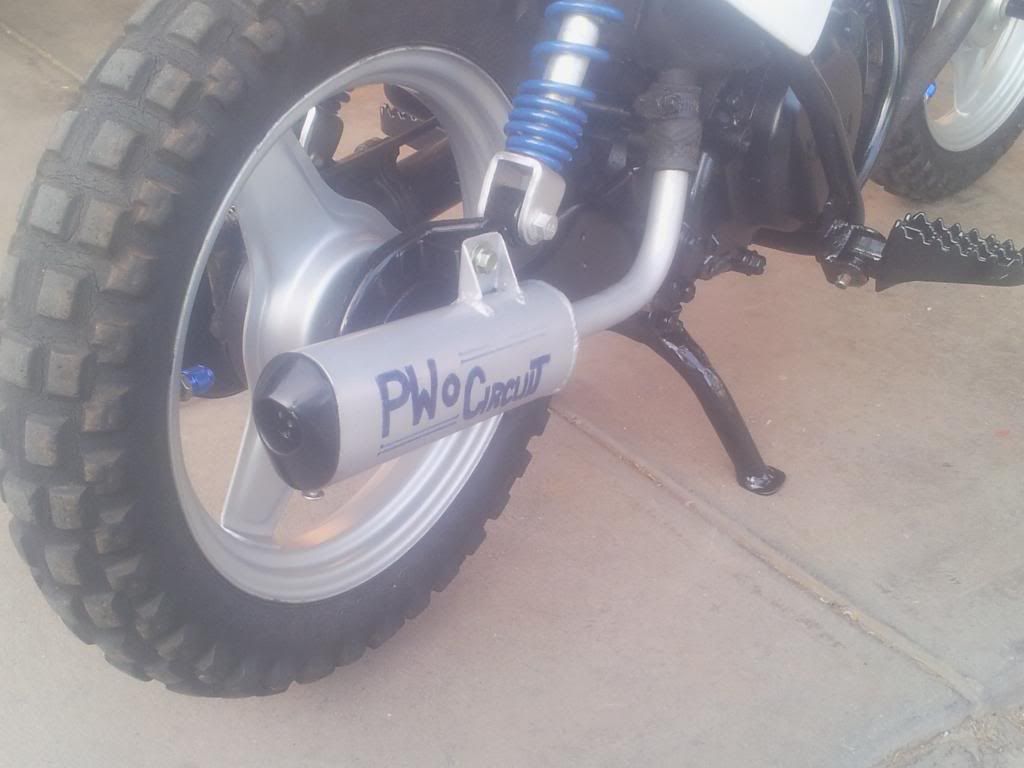
did anyone notice the trainer wheels are gone ?
and the rubber footpegs have been swapped for alloy pit bike ones ?
and there is a custom made kick stand fitted too, made by me of course, i used up some more scrap steel, lol
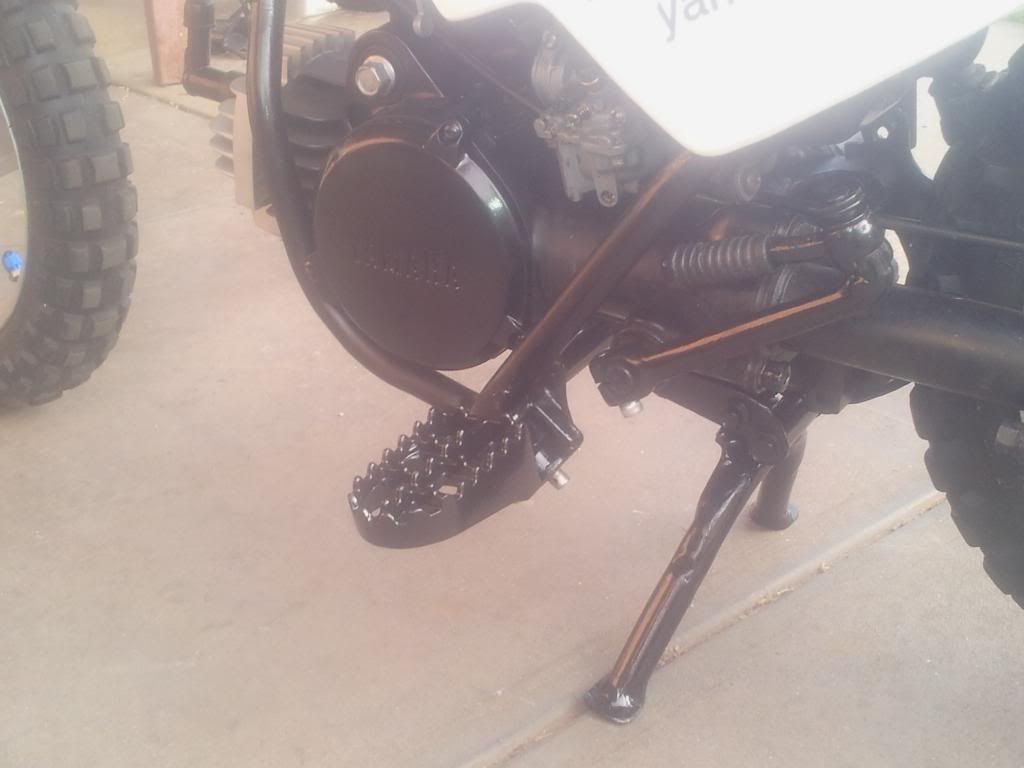
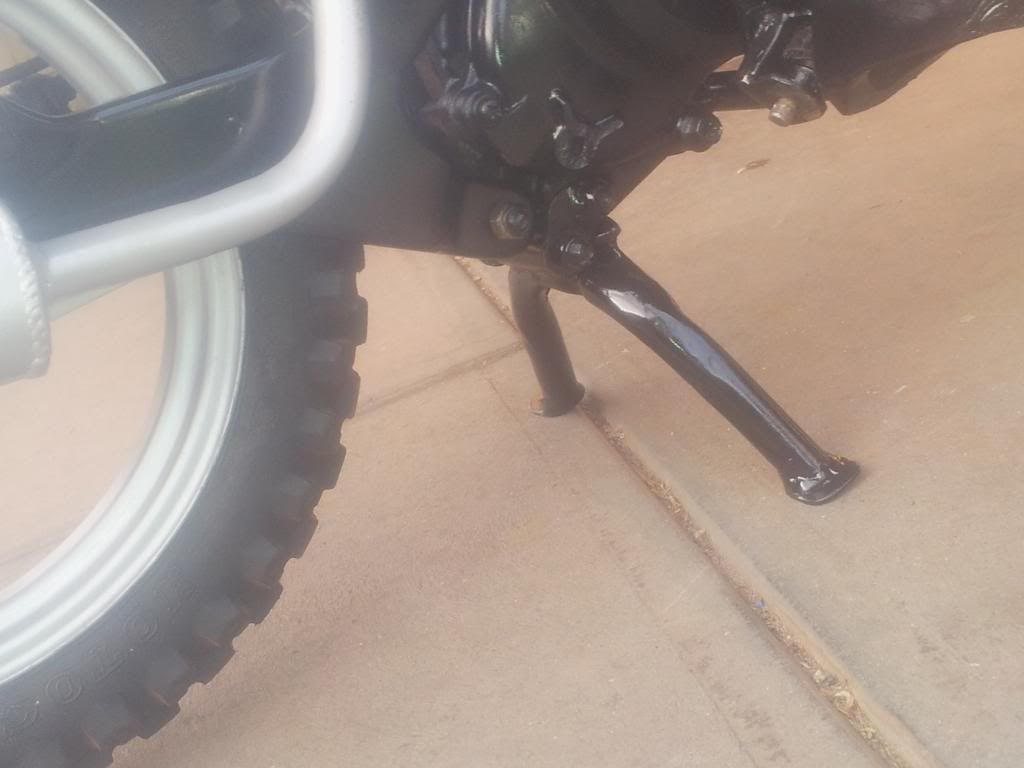
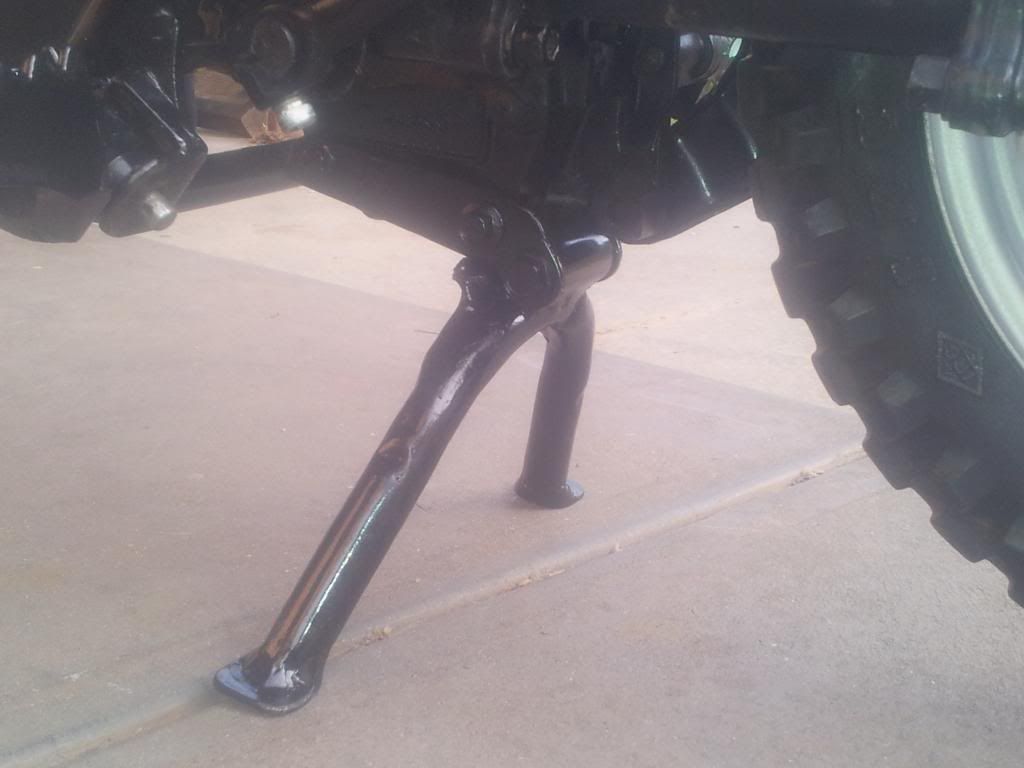
last thing, i fitted a pair of 19mm bar risers to the PW,
they give him a better angle to hold the bars, bent elbows, plus a little more leg room when turning.
i saw them on a couple of PW parts sites, some basic steel spacers for the bars were around $30.
these are ex 1966 Ford Falcon seat rail spacers, cost me nothing from my Fairmont spares

muffler with OEM style mount ,


did anyone notice the trainer wheels are gone ?
and the rubber footpegs have been swapped for alloy pit bike ones ?
and there is a custom made kick stand fitted too, made by me of course, i used up some more scrap steel, lol


last thing, i fitted a pair of 19mm bar risers to the PW,
they give him a better angle to hold the bars, bent elbows, plus a little more leg room when turning.
i saw them on a couple of PW parts sites, some basic steel spacers for the bars were around $30.
these are ex 1966 Ford Falcon seat rail spacers, cost me nothing from my Fairmont spares

my67xr
Miniriders Legend and Master Spanner Spinning Mode
Rodney68
Well-Known Member
How does the bike go now Craig?
my67xr
Miniriders Legend and Master Spanner Spinning Mode
i've not long got home, been out all day picking up a few things
i picked up a brand new chinese PY50 choke cable/lever for it today, lubed and fitted it, and works like a charm.
and also a spare tube 10 x 2.50, just incase i ever need it, cable cost $20 and the tube was $5.
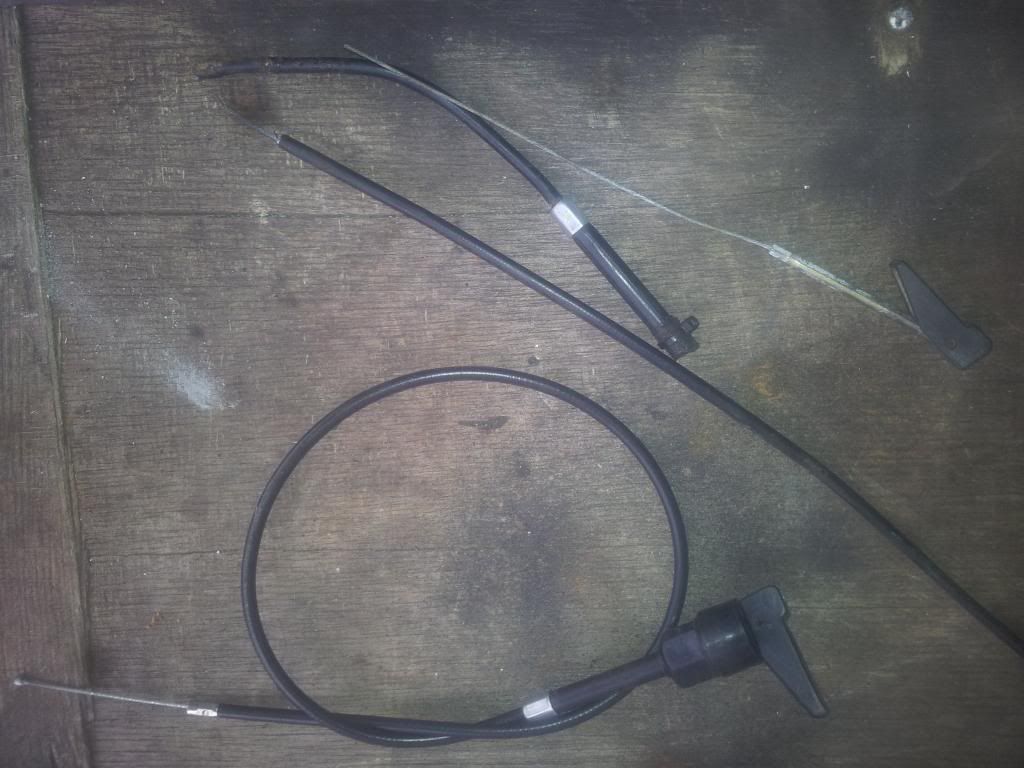
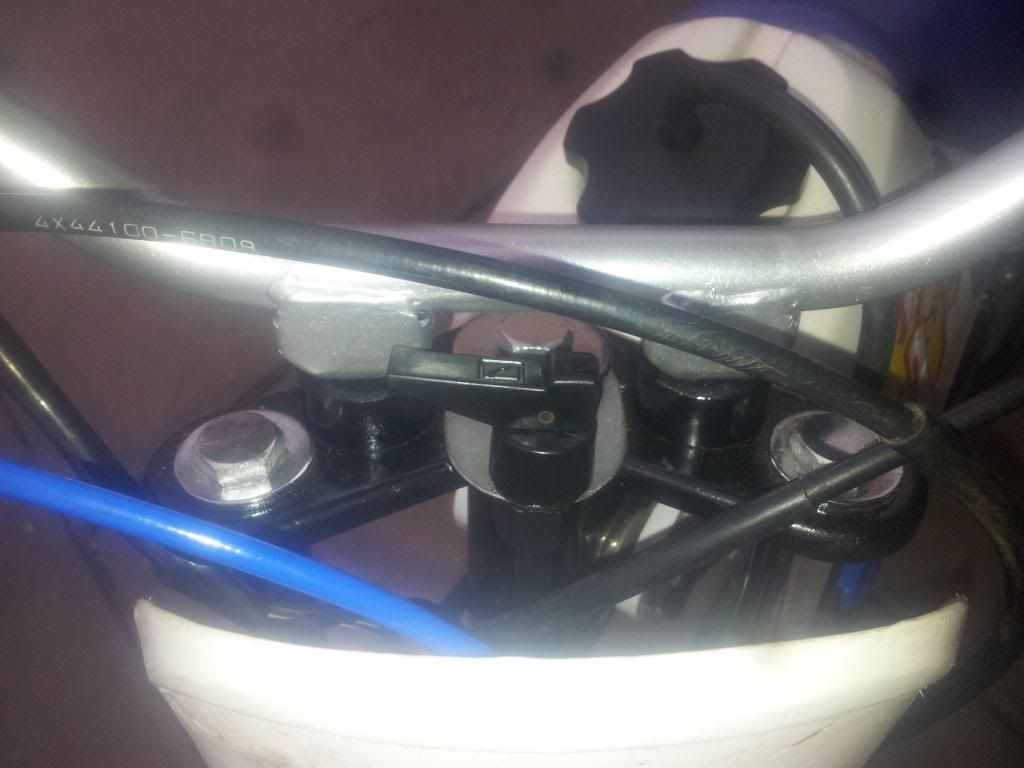
the bike starts a lot easier now with a choke, i still haven't had a chance to make a video of the sound.
i want to do a before expansion chamber cleanout video, and an after video.
then one with the original silencer, and one with the new custom muffler, hopefully tomorrow sometime ?
i picked up a brand new chinese PY50 choke cable/lever for it today, lubed and fitted it, and works like a charm.
and also a spare tube 10 x 2.50, just incase i ever need it, cable cost $20 and the tube was $5.


the bike starts a lot easier now with a choke, i still haven't had a chance to make a video of the sound.
i want to do a before expansion chamber cleanout video, and an after video.
then one with the original silencer, and one with the new custom muffler, hopefully tomorrow sometime ?
my67xr
Miniriders Legend and Master Spanner Spinning Mode
still haven't done the videos...
i got a little side tracked,
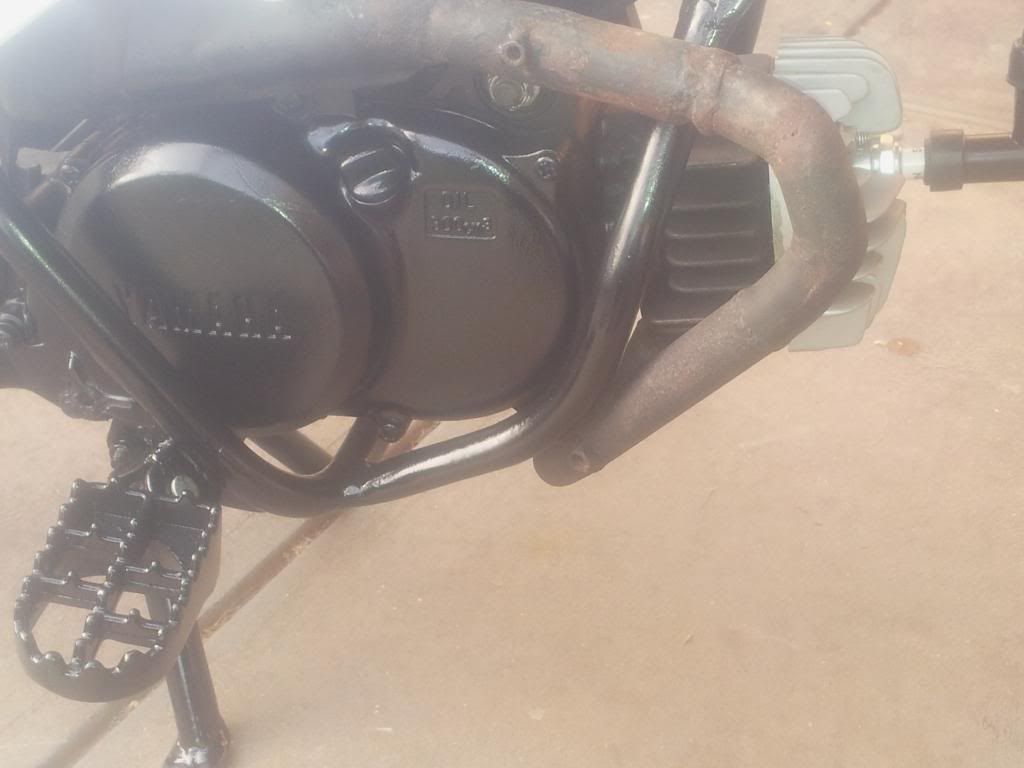
the expansion chamber header pipe was replaced at some stage before i bought the bike, was either rusted, dented or wrecked somehow?
the new pipe they bent up and welded on was a pretty poor job.
the i/d of the tubing was smaller than original, the bends were heated and cut and shut restricting the flow more etc
the motor pivots on the bolt just below the back of the header pipe, so when the rear shocks compress the motor moves upwards at the rear in the frame, this makes the old header pipe touch the frame at the front after compressing the rear shock 30mm, not much movement there !
i have made a new header pipe for it,
i cut up an old pitbike pipe and used that to replace the restricted piping
it is pretty much the same diameter as the original,
and allows for the rear suspension to work properly too, without fouling the pipe on the front of the frame when the rear shocks compress.
a before pic,

old pipe removed,
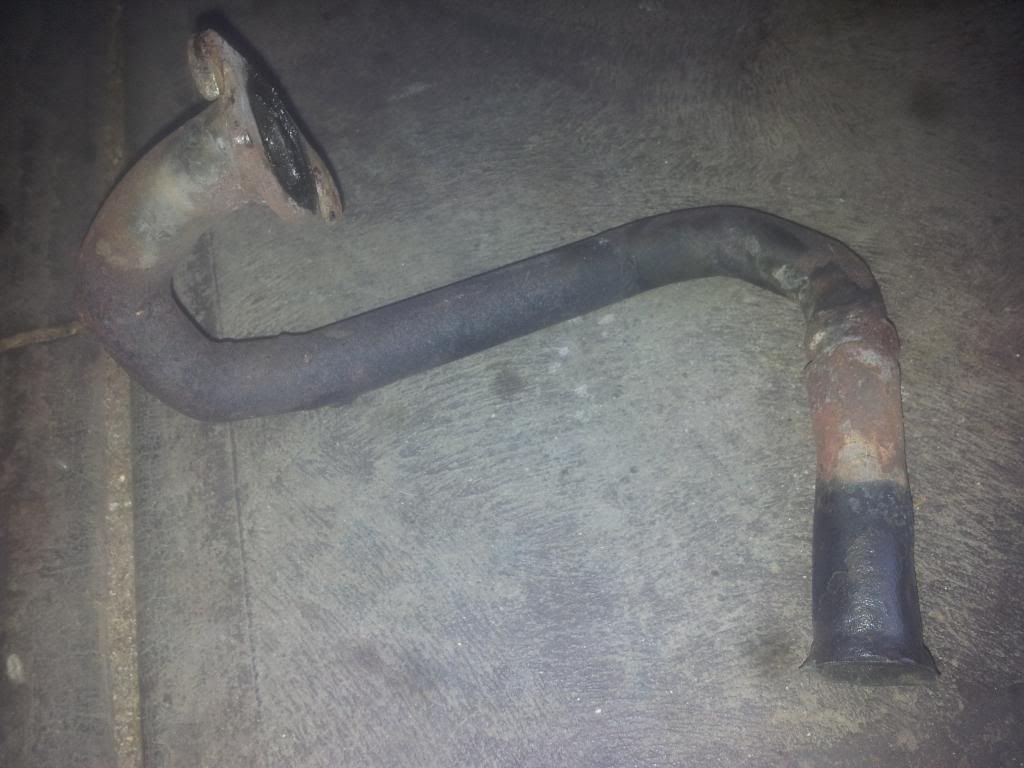
and after pics,
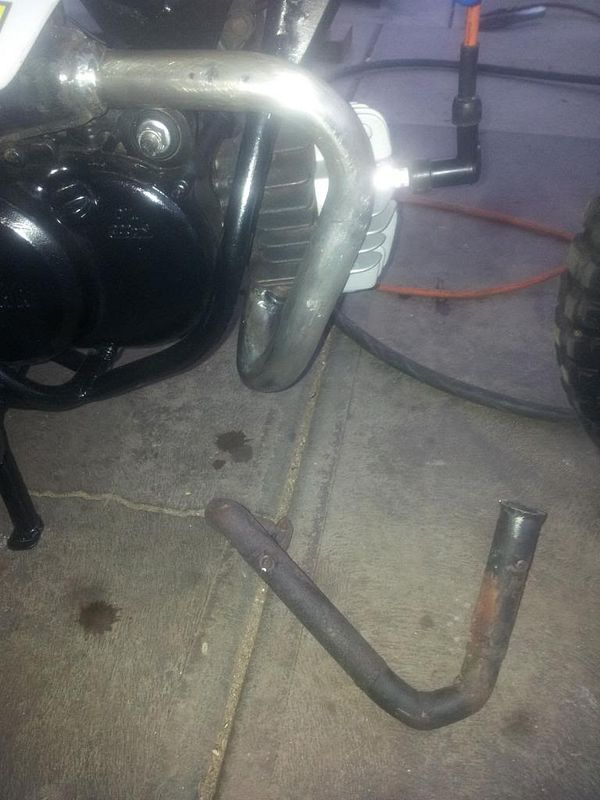
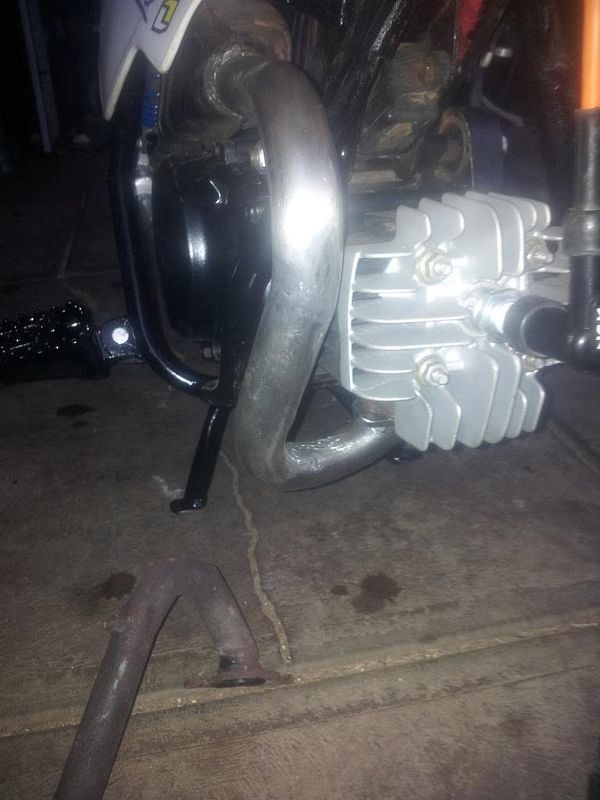
i still need to burn out the carbon/oil inside the expansion chamber too.
i got a little side tracked,
the expansion chamber header pipe was replaced at some stage before i bought the bike, was either rusted, dented or wrecked somehow?
the new pipe they bent up and welded on was a pretty poor job.
the i/d of the tubing was smaller than original, the bends were heated and cut and shut restricting the flow more etc
the motor pivots on the bolt just below the back of the header pipe, so when the rear shocks compress the motor moves upwards at the rear in the frame, this makes the old header pipe touch the frame at the front after compressing the rear shock 30mm, not much movement there !
i have made a new header pipe for it,
i cut up an old pitbike pipe and used that to replace the restricted piping
it is pretty much the same diameter as the original,
and allows for the rear suspension to work properly too, without fouling the pipe on the front of the frame when the rear shocks compress.
a before pic,

old pipe removed,

and after pics,


i still need to burn out the carbon/oil inside the expansion chamber too.
Last edited:




![Bike Phone Mount Holder, [Camera Friendly] Motorcycle Phone Mount for Electric Scooter, Mountain, Dirt Bike and Motorcycle - 360° Rotate Suitable for iPhone & Android Smartphones from 4.5-7.0 inches](https://m.media-amazon.com/images/I/51ZirRrsA+L._SL500_.jpg)
![LISEN Bike Phone Holder, [2024 Upgrade] Motorcycle Phone Mount, Bicycle Phone Holder, Handlebar Phone Mount, Dirt Bike Accessories, Bicycle Accessories, Gifts for Men for iPhone 4.7-7" Phone, Black](https://m.media-amazon.com/images/I/41FJGrZQ5ML._SL500_.jpg)


