my67xr
Miniriders Legend and Master Spanner Spinning Mode
ok,
some of you may have seen my DS80 build/repair thread.
i took the bike up to our farm a month ago and tried it out.
it goes pretty well all in all, 5 speed gearbox is sweet and motor doesn't miss a beat.
pulls hard till it hits powerband then gives a fair bit more as the revs increase.
im very happy with it, especially for being pretty much a factory stocker bike.
on the last day we were there, i spent a few hours cutting a track with my father inlaws 4WD mini John Deere tractor, fitted with a bucket on the front.
the soil was very compacted etc, and a fair bit of weed around too, salt bush and native stuff.
i made a small track with a couple of straights, a few corners around the trees and a few hairpins corners too.
i will try and build it up each time i go, burms, jumps and extend it out longer too, we have plenty of room.
currently it is about 250 metres long.
i have done 20 or so laps on the DS80 on the track, but it came to an end.
i came off the bike a couple of times around the corners, trying to go too quick.
you get that i guess, :LolLolLolLol:
last lap i had my 11 yo son do a video for me on my phone, dodgy quality
i got half way around the track and as i was coming into the corner i head some cracking noises from the rear of the bike.
slowed down and the rear suddenly locked up, i layed the bike down.
got up started it, and went to take off and head back to the car.
the brake pedal was bent under the engines' side case.
i straightened it up and tried to take off again, still needed to bend the arm a bit more.
i got it free ,and slowly rode it back to the car.
the cracking noises were getting worse, i looked down and saw the rear sprocket bolts hanging out, and pussied it back to where we had parked.
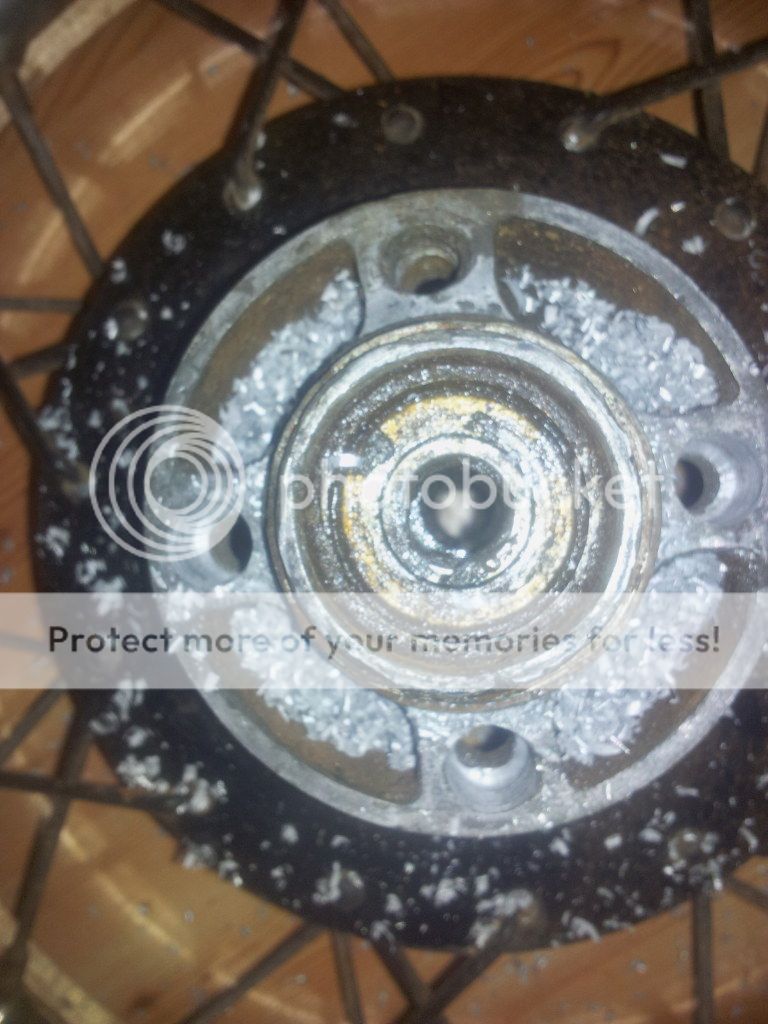
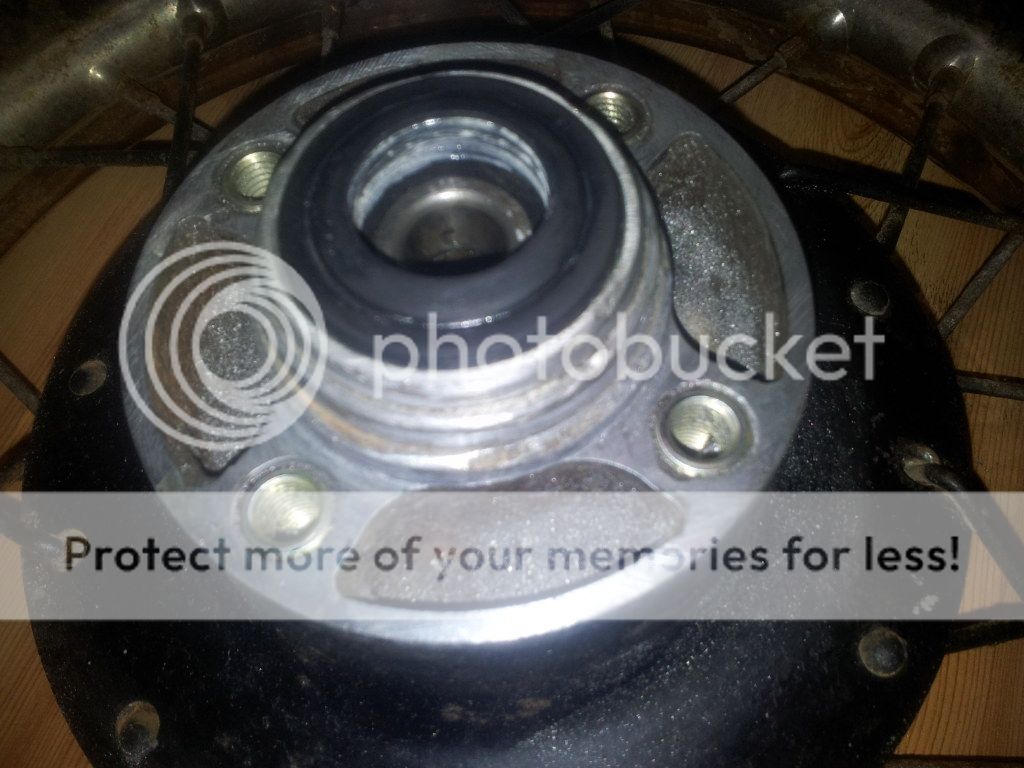
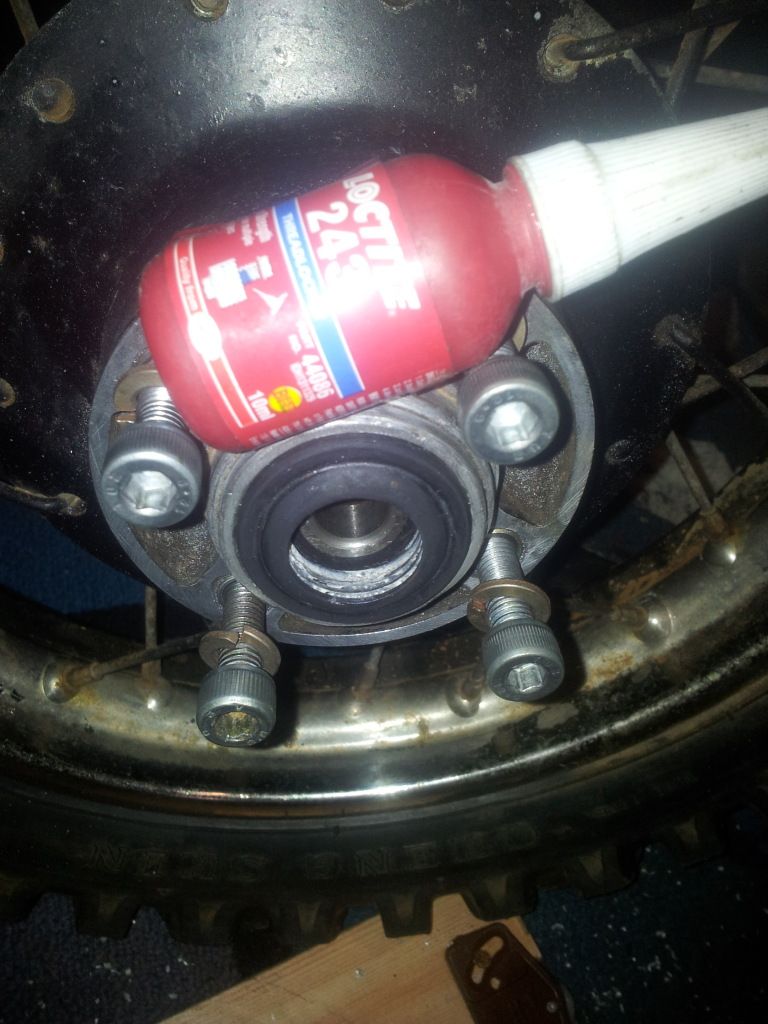
we took the bike back to the workshop and pulled the back wheel off, i found that a previous owner had damaged the threads in the rear hub, where the sprocket bolted to.
then noticed the loose bolts had started chewing into the hub, hmm
and finally noticed the bolts they had used wer M8 x 1.25mm thread, no lock washers/tabs on them.
the thread in the hubs was M8 x 1mm.
that combination doesnt work for long at the best of times.
here's a pic of the damaged hub, i brought it back home to fix.
all the bolt holes were looking like the top one, hmm!
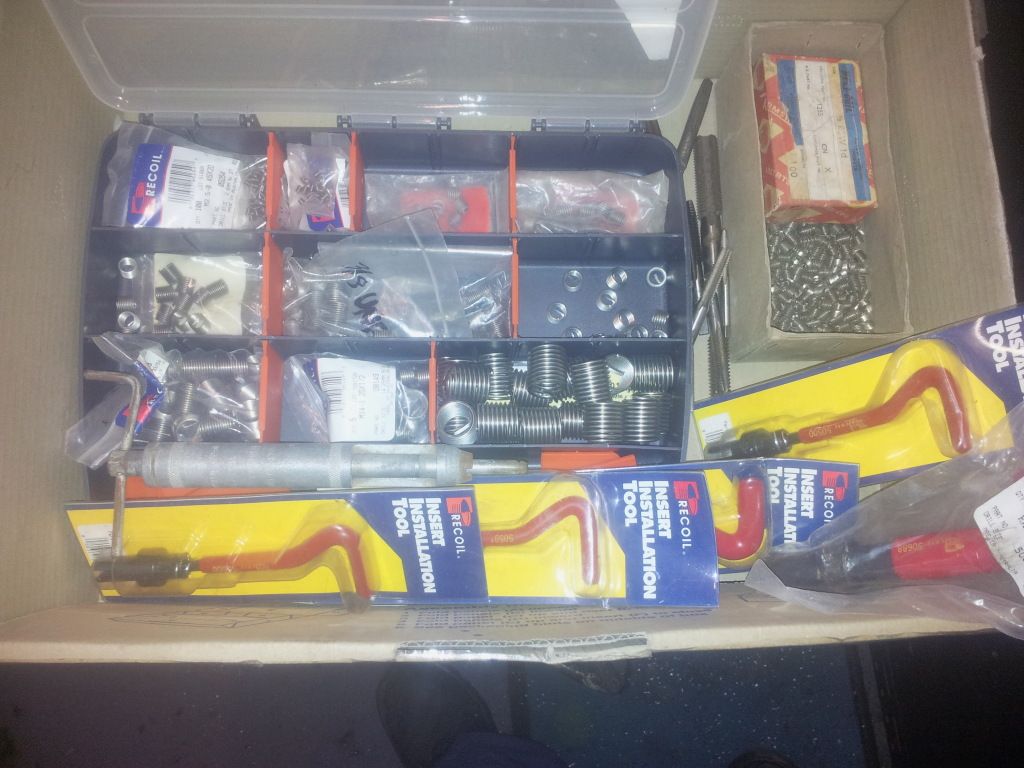
a month later i had a chance to look at it again, i went and bought some threaded insert repair kits from the local parts store.
i have used these plenty of times before fixing damaged threads.
i like them as the a drilled and tapped solid rod, not the Helicoil/Recoil
style wire thread inserts
they didn't have any in the finer thread i wanted, so i bought the slightly coarser ones to save mucking around/waiting etc.
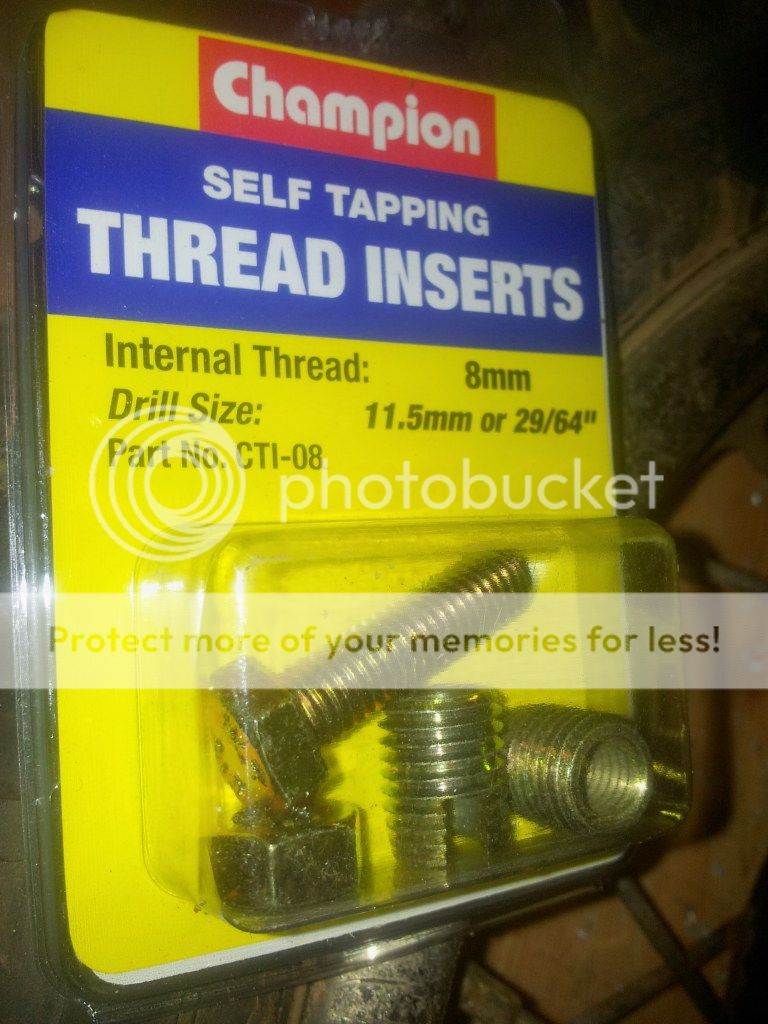
these are very easy to fit, and are a cheap way of repairing things so they'll last for years.
you get a bolt, nut and 2 inserts for around $12, depending on size etc.
on the packaging it tells you what size drill to use to cut the new hole.
i drilled it out to 11.5mm as noted in the instructions.
drilling square to the hub face, and slightly deeper than the insert.
next step, screw the nut onto the bolt, most of the way on
and then screw the insert on as well, the bolt needs to go 2/3 of the way through the insert.
then wind the nut down tight onto the insert and lock it up.
i chose to use loctite on the thread to make sure it wouldnt come loose again.
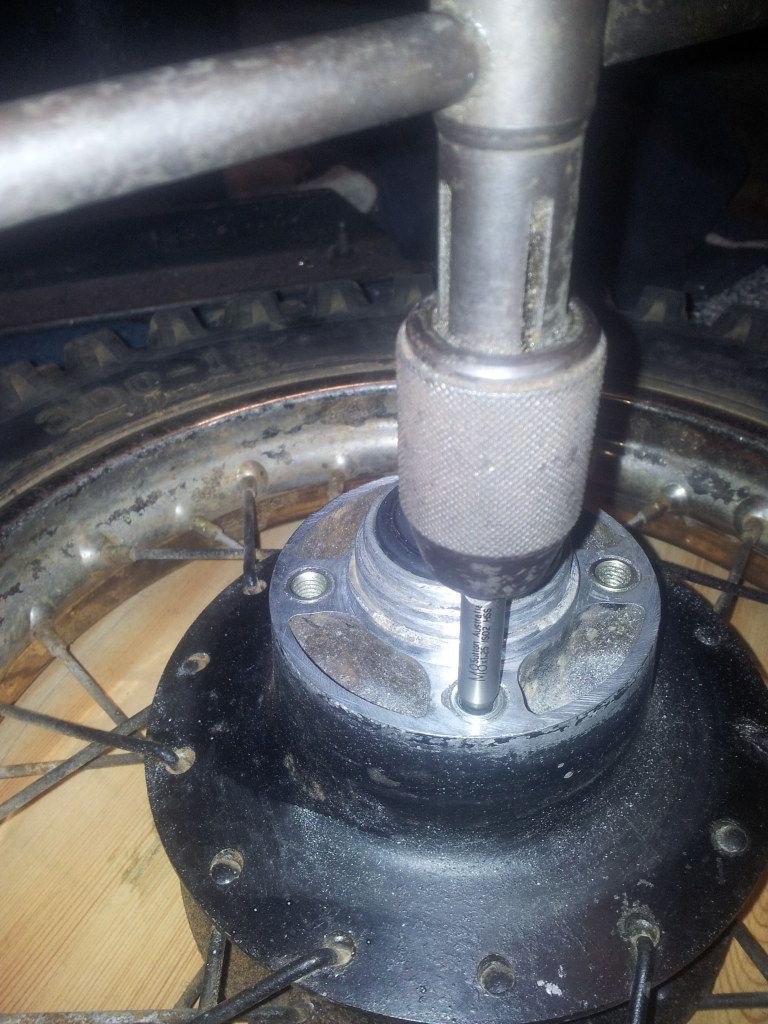
sit the insert into the new hole and square it up.
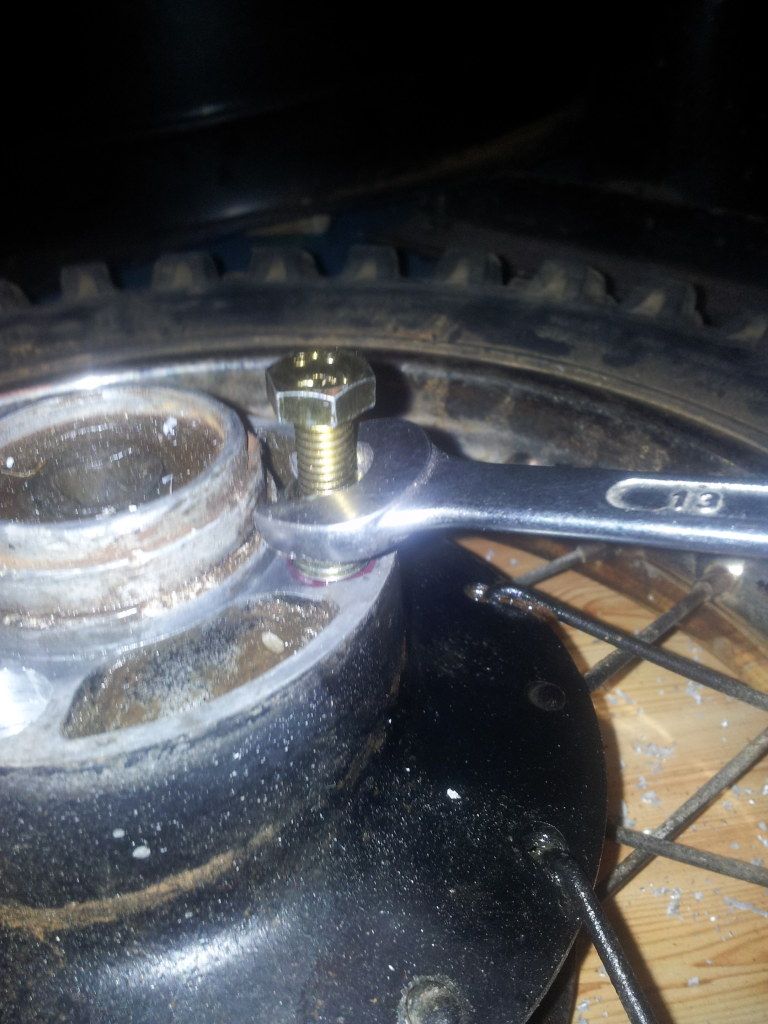
next using an open end spanner to do the up via the nut (not the bolt),
some slight downward pressure is needed for the flutes to start cutting as you do it up.
the alloy cuts like cheese, hardly any force is needed to turn the spanner.
you only need to keep doing it up, as the swarf drops to the bottom of the hole, or in this case out the bottom of the hole.
you dont need to turn the nut back like when tapping a thread, just keep winding it in, the big cutting slots easily clear themselves
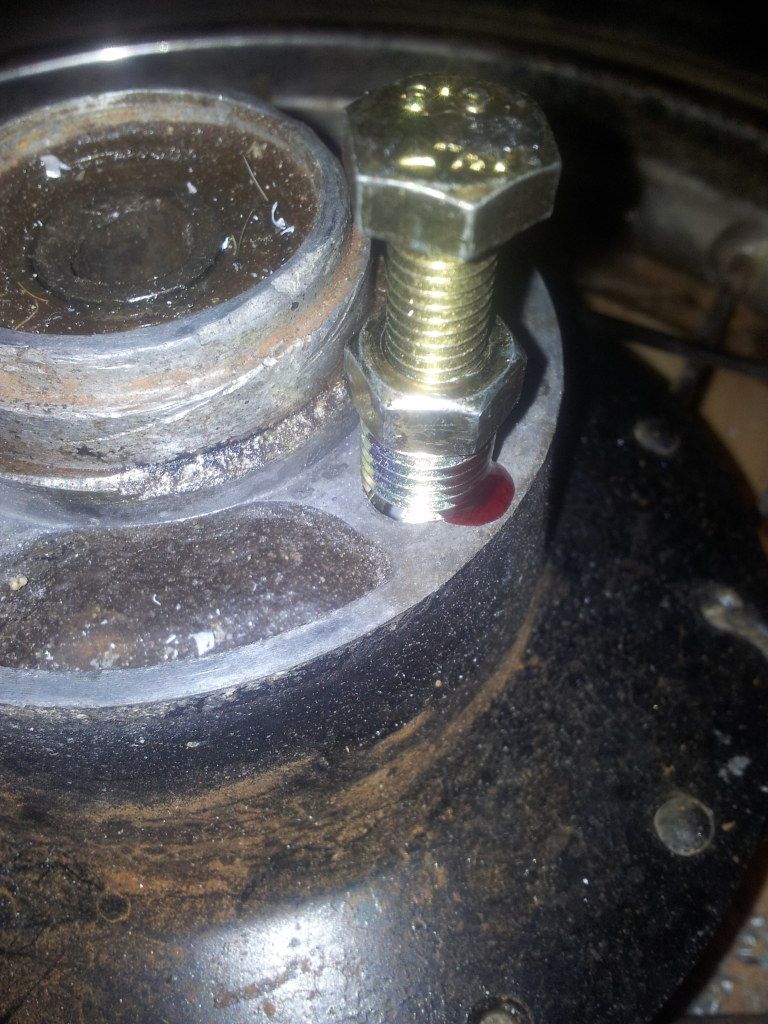
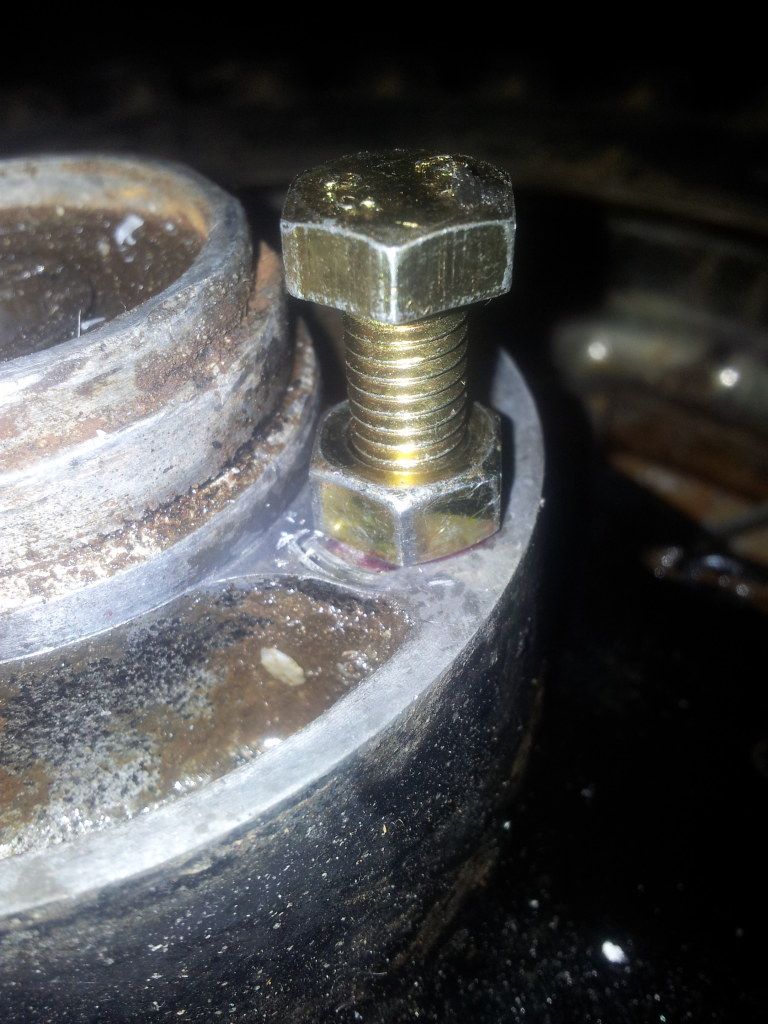
you know when you are done, as the nut will tighten up against the sprocket flange, or whatever it is going into.
once you have it tight it will look like this.
next grab another spanner and hold the bolt from moving, so the nut can be undone.
it only needs a little turn of the nut for the whole lot to become loose, and just unscrew the bolt from the insert.

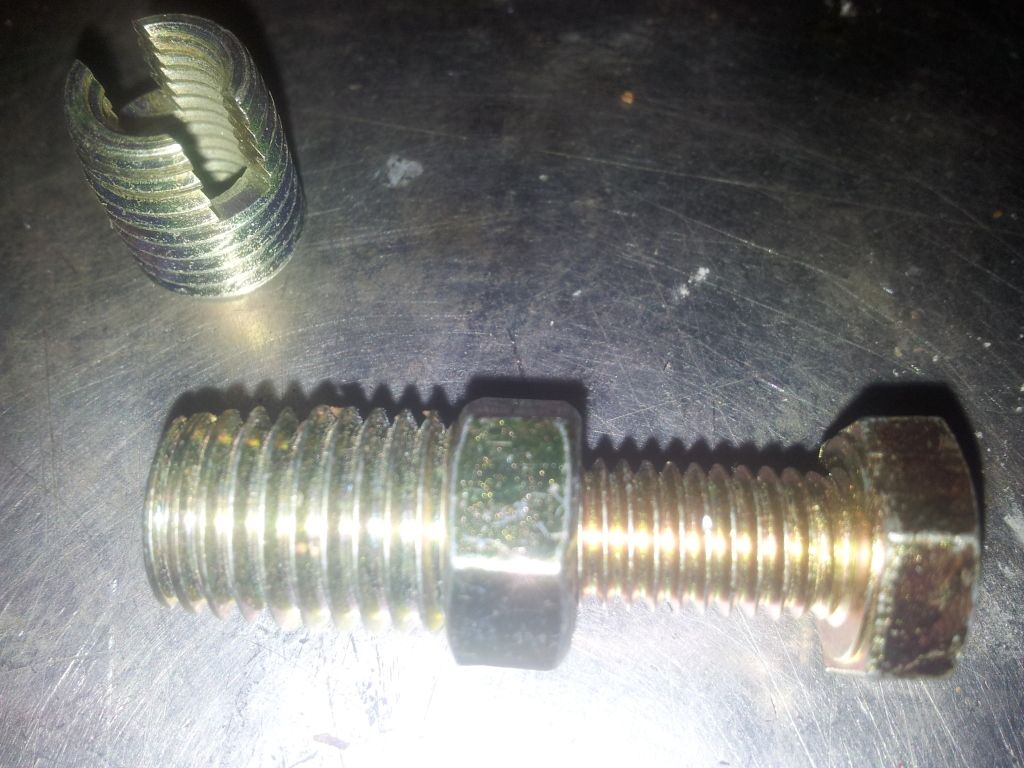
once the bolt is out, you are left with this,
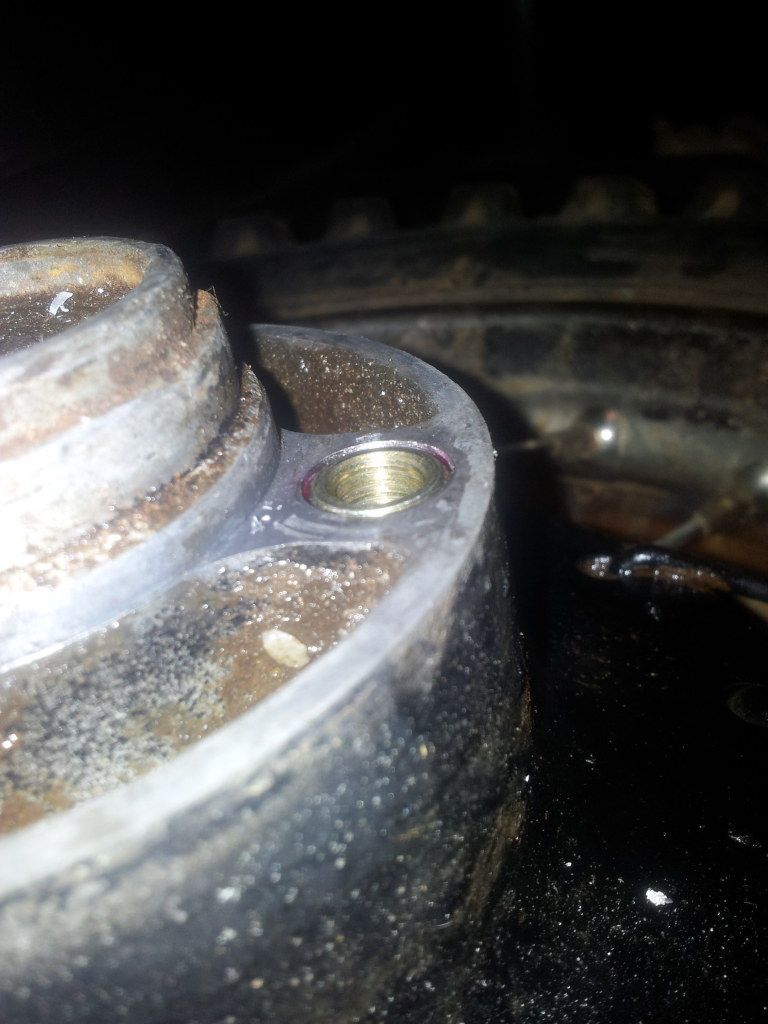
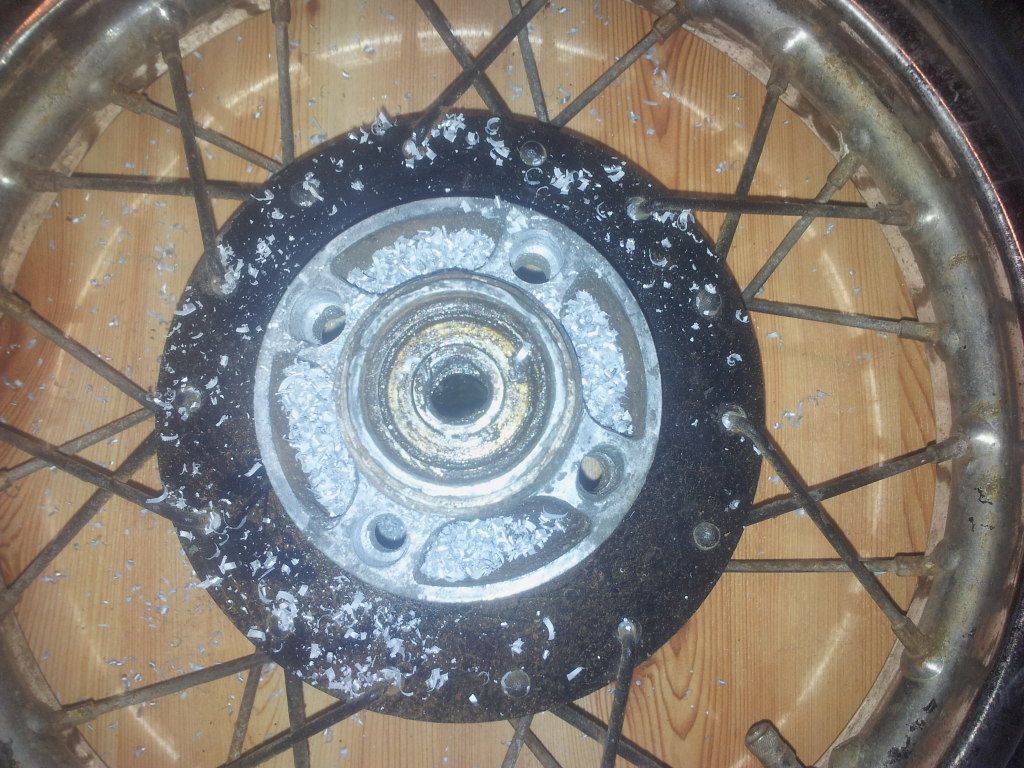
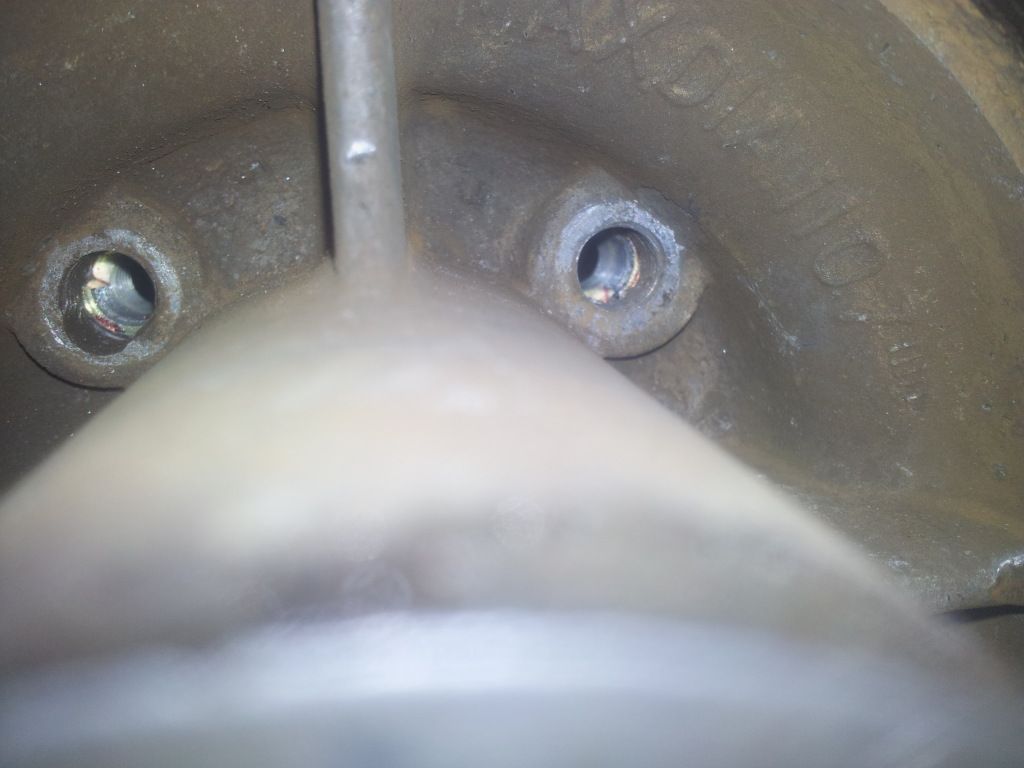
repeat the steps above for the other 3x remaining inserts and here it is,
being threaded all the way through this hub, i just ran a tap the rest of the way through.
here is a pic from the brake drum side, you can see the 2x cutting tabs in the bottom of the insert.
and the tapped thread continues now right the way through.
next i ran a fine file across the sprocket mounting face to deburr any of the damage, and make it smooth/square again.
i fitted a new bearing there too while i was at it, as the sprocket side of a wheel gets the most wear.
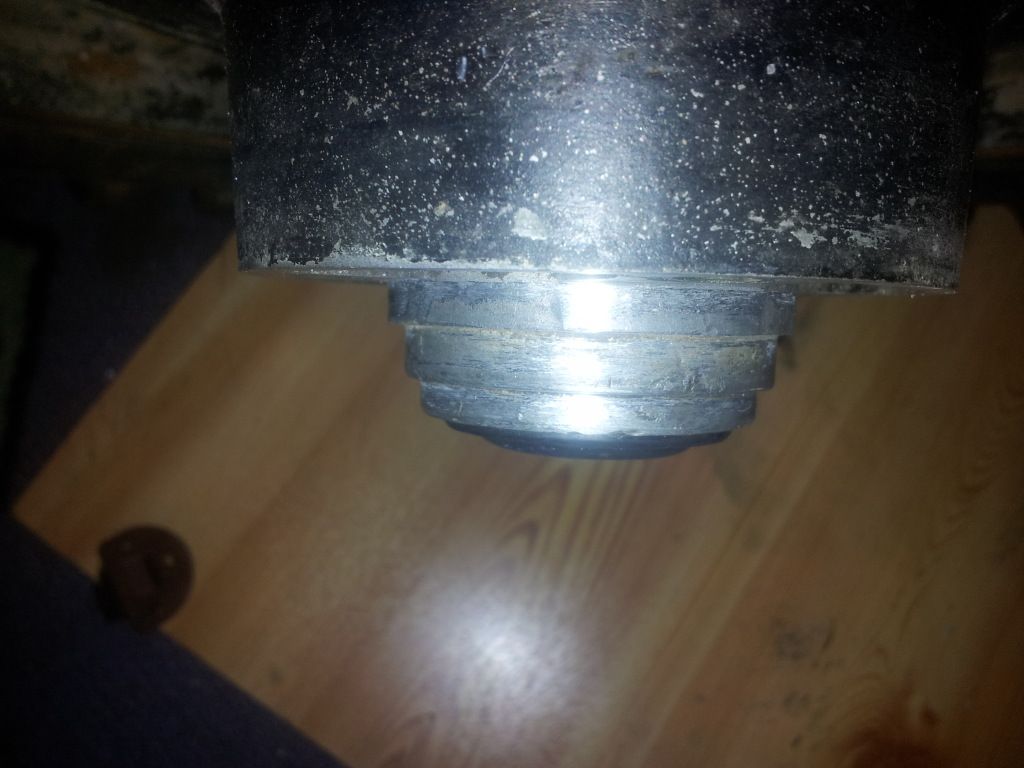
and a pic looking almost square to the face of the hub,
showing that there is none of the inserts sitting higher than the mounting surface of the sprocket.
so that's pretty much it, how to fit a new thread insert.
while im writing about rear hubs, here is another tip.
the rear sprocket bolts need to be a decent quality.
most of the china pit bikes come with some bad quality bolts as you would have found out.
i will be using some socket head cap screw bolts and high tensile washers to hold the sprocket on when i put it back together, and loctite too to stop this happening again.
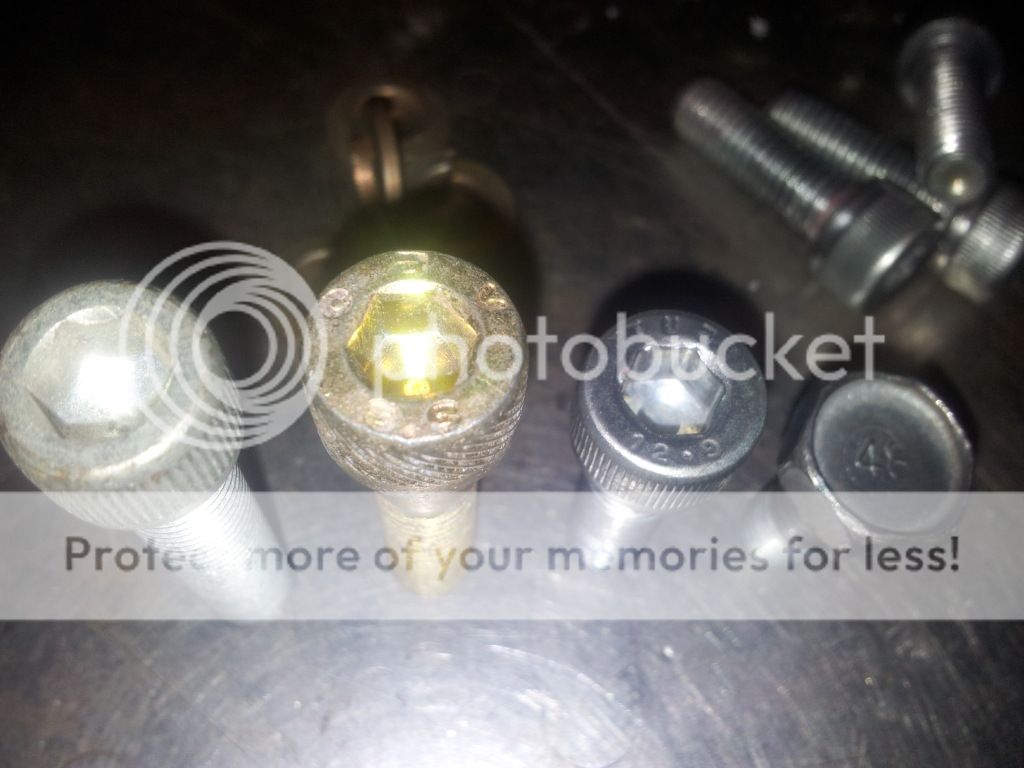
here is a comparison of china and some decent bolts,
chigh *&%#!???!?***--- (haha) tensile bolt on the far left, this would be about a 4.8 tensile strength bolt
next a cheaper socket head high tensile bolt, rated at 8.8 tensile strength
then the bolts im using, 12.9 rated tensile strength.
and final bolt on the right, a 4.8 standard china chigh *&%#!???!?***--- (haha) tensile bolt, with a full guarantee that it will fail asap.....
hopefully this thread may help someone else out too,
and that i havent redone someone else thread??
now stop reading this, get outside and get yourself some thread inserts, and fix that damaged thread.
and jump on your bike and riiiiiiiiide haaaaaard!!!!! ........:scooter:
good luck and cheers,
craig
some of you may have seen my DS80 build/repair thread.
i took the bike up to our farm a month ago and tried it out.
it goes pretty well all in all, 5 speed gearbox is sweet and motor doesn't miss a beat.
pulls hard till it hits powerband then gives a fair bit more as the revs increase.
im very happy with it, especially for being pretty much a factory stocker bike.
on the last day we were there, i spent a few hours cutting a track with my father inlaws 4WD mini John Deere tractor, fitted with a bucket on the front.
the soil was very compacted etc, and a fair bit of weed around too, salt bush and native stuff.
i made a small track with a couple of straights, a few corners around the trees and a few hairpins corners too.
i will try and build it up each time i go, burms, jumps and extend it out longer too, we have plenty of room.
currently it is about 250 metres long.
i have done 20 or so laps on the DS80 on the track, but it came to an end.
i came off the bike a couple of times around the corners, trying to go too quick.
you get that i guess, :LolLolLolLol:
last lap i had my 11 yo son do a video for me on my phone, dodgy quality
i got half way around the track and as i was coming into the corner i head some cracking noises from the rear of the bike.
slowed down and the rear suddenly locked up, i layed the bike down.
got up started it, and went to take off and head back to the car.
the brake pedal was bent under the engines' side case.
i straightened it up and tried to take off again, still needed to bend the arm a bit more.
i got it free ,and slowly rode it back to the car.
the cracking noises were getting worse, i looked down and saw the rear sprocket bolts hanging out, and pussied it back to where we had parked.
we took the bike back to the workshop and pulled the back wheel off, i found that a previous owner had damaged the threads in the rear hub, where the sprocket bolted to.
then noticed the loose bolts had started chewing into the hub, hmm
and finally noticed the bolts they had used wer M8 x 1.25mm thread, no lock washers/tabs on them.
the thread in the hubs was M8 x 1mm.
that combination doesnt work for long at the best of times.
here's a pic of the damaged hub, i brought it back home to fix.
all the bolt holes were looking like the top one, hmm!
a month later i had a chance to look at it again, i went and bought some threaded insert repair kits from the local parts store.
i have used these plenty of times before fixing damaged threads.
i like them as the a drilled and tapped solid rod, not the Helicoil/Recoil
style wire thread inserts
they didn't have any in the finer thread i wanted, so i bought the slightly coarser ones to save mucking around/waiting etc.
these are very easy to fit, and are a cheap way of repairing things so they'll last for years.
you get a bolt, nut and 2 inserts for around $12, depending on size etc.
on the packaging it tells you what size drill to use to cut the new hole.
i drilled it out to 11.5mm as noted in the instructions.
drilling square to the hub face, and slightly deeper than the insert.
next step, screw the nut onto the bolt, most of the way on
and then screw the insert on as well, the bolt needs to go 2/3 of the way through the insert.
then wind the nut down tight onto the insert and lock it up.
i chose to use loctite on the thread to make sure it wouldnt come loose again.
sit the insert into the new hole and square it up.
next using an open end spanner to do the up via the nut (not the bolt),
some slight downward pressure is needed for the flutes to start cutting as you do it up.
the alloy cuts like cheese, hardly any force is needed to turn the spanner.
you only need to keep doing it up, as the swarf drops to the bottom of the hole, or in this case out the bottom of the hole.
you dont need to turn the nut back like when tapping a thread, just keep winding it in, the big cutting slots easily clear themselves
you know when you are done, as the nut will tighten up against the sprocket flange, or whatever it is going into.
once you have it tight it will look like this.
next grab another spanner and hold the bolt from moving, so the nut can be undone.
it only needs a little turn of the nut for the whole lot to become loose, and just unscrew the bolt from the insert.
once the bolt is out, you are left with this,
repeat the steps above for the other 3x remaining inserts and here it is,
being threaded all the way through this hub, i just ran a tap the rest of the way through.
here is a pic from the brake drum side, you can see the 2x cutting tabs in the bottom of the insert.
and the tapped thread continues now right the way through.
next i ran a fine file across the sprocket mounting face to deburr any of the damage, and make it smooth/square again.
i fitted a new bearing there too while i was at it, as the sprocket side of a wheel gets the most wear.
and a pic looking almost square to the face of the hub,
showing that there is none of the inserts sitting higher than the mounting surface of the sprocket.
so that's pretty much it, how to fit a new thread insert.
while im writing about rear hubs, here is another tip.
the rear sprocket bolts need to be a decent quality.
most of the china pit bikes come with some bad quality bolts as you would have found out.
i will be using some socket head cap screw bolts and high tensile washers to hold the sprocket on when i put it back together, and loctite too to stop this happening again.
here is a comparison of china and some decent bolts,
chigh *&%#!???!?***--- (haha) tensile bolt on the far left, this would be about a 4.8 tensile strength bolt
next a cheaper socket head high tensile bolt, rated at 8.8 tensile strength
then the bolts im using, 12.9 rated tensile strength.
and final bolt on the right, a 4.8 standard china chigh *&%#!???!?***--- (haha) tensile bolt, with a full guarantee that it will fail asap.....

hopefully this thread may help someone else out too,
and that i havent redone someone else thread??
now stop reading this, get outside and get yourself some thread inserts, and fix that damaged thread.
and jump on your bike and riiiiiiiiide haaaaaard!!!!! ........:scooter:
good luck and cheers,
craig
Last edited:


![JOYROOM Bike Phone Holder Mount, [Anti Vibration] Bicycle Phone Mount, Dirt Bike Accessories for All 4.7-7.0" Phones, Motorcycle Phone Mount for iPhone 16 Pro Max/15/14/13/12 Samsung S25 Ultra/S24/S23](https://m.media-amazon.com/images/I/41MPtPvknUL._SL500_.jpg)

![Zewdov Motorcycle Phone Mount, Upgrade Bike Phone Mount [1s Lock][Secure Protection], 360° Rotatable Phone Holder for Mountain Bike/ATV/Scooter Handlebar, Compatible with iPhone/Samsung 4.7-6.7"](https://m.media-amazon.com/images/I/51lvX8e2C3L._SL500_.jpg)

![LISEN Bike Phone Holder, [2025 Upgrade] Motorcycle Phone Mount, Bicycle Phone Holder, Handlebar Phone Mount, Dirt Bike Accessories, Bicycle Accessories, for iPhone Samsung Google Pixel, Black](https://m.media-amazon.com/images/I/41FJGrZQ5ML._SL500_.jpg)