You are using an out of date browser. It may not display this or other websites correctly.
You should upgrade or use an alternative browser.
You should upgrade or use an alternative browser.
2008 Atomik Blitz 250 review
- Thread starter thump*140
- Start date

Help Support Mini Dirt Bikes & Pit Bikes Forum:
This site may earn a commission from merchant affiliate
links, including eBay, Amazon, and others.
Nice work Rastus, yeah the Atomiks arent reknowned for the build quality, BUT, it is possible to turn them into great bikes with a good initial set-up, regular maintenance and a few better parts bolted on, but then i havent owned too many Jap bikes that didnt need the same thing... 
There is a thread in the How-To section dedicated entirely to setting up new bikes, that might be of some help as well.
There is a thread in the How-To section dedicated entirely to setting up new bikes, that might be of some help as well.
BlitzKrieg V2.0... Bling that F****r up!!!
Ok, so JR Motorsports made the mistake of quoting all prices in USD when the Aussie dollar went north recently, so i made "one or two" purchases to take advantage of the cheap prices...
For the grand total of $177, which INCLUDED postage to my door, I scored the following items...
Billet CNC "Grubscrew" footpegs.
"Poo-Taper" bars.
Oversized bar clamps, Black CNC Billet.
Two 1/8 turn black Billet throttles.
Headlight.
Red and Gold fuel caps.
Hydraulic clutch in Gold.
ASV copy levers also in Gold.
All in all, pretty good score i reckon. Ebay, take a bow, we thank you.
Ok, so here's the pics and a brief description if they weren't literally a bolt-on item.
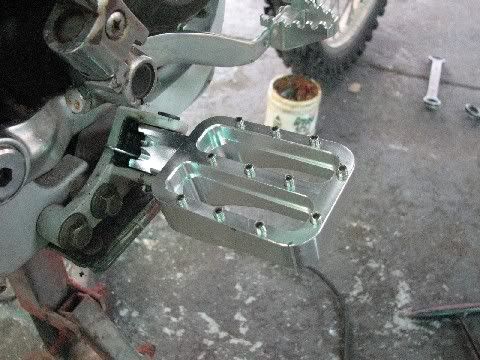
Footpegs. Different backing to the stock Atomik crappy cast ones. Required a small square of 6mm flat plate steel to be welded into the peg mount, to "raise" the angle of the pegs, as with the standard set up, they were droopier than ****s in a National Geographic magazine. 6mm plate welded in, they sit up just higher than horizontal. Driveway testing reveals them to be grabbier than a drunk 16 year old in a strip club.
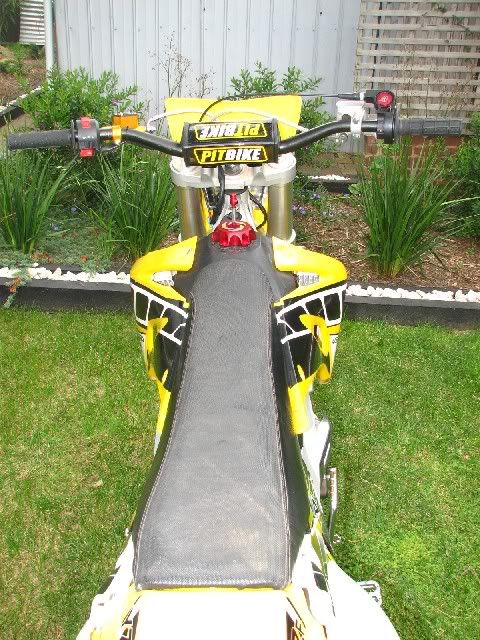
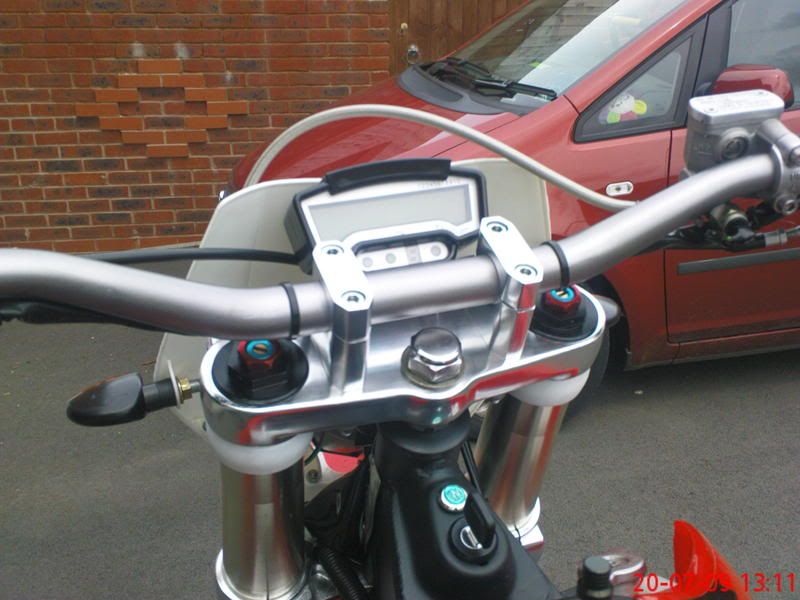
Poo-Taper bars and CNC Billet bar clamps.
Bolted straight into the YZF400 triple clamp i'm running. No issues with fitment.
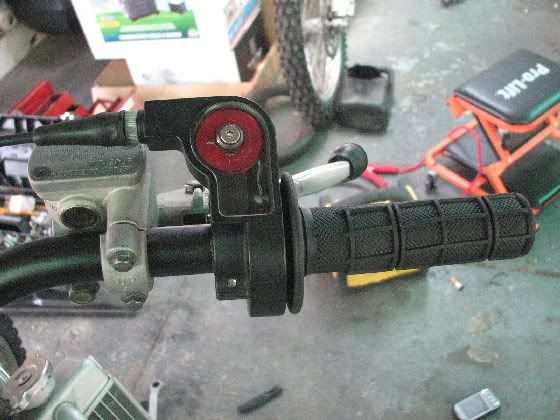
1/8 turn Billet throttle.
This one caused a few headaches, but required a simple fix. the stock Blitz throttle cable is ok with a 1/4 turn throttle, not a 1/8 though... simply pulled the throttle apart, and using my bench grinder took a little bit of alloy off of the throttle stop.. allowed the throttle to "close" further, (rotate forwards) thus allowing a bit more freeplay in the cable. Idle back down under 4000rpm once done...
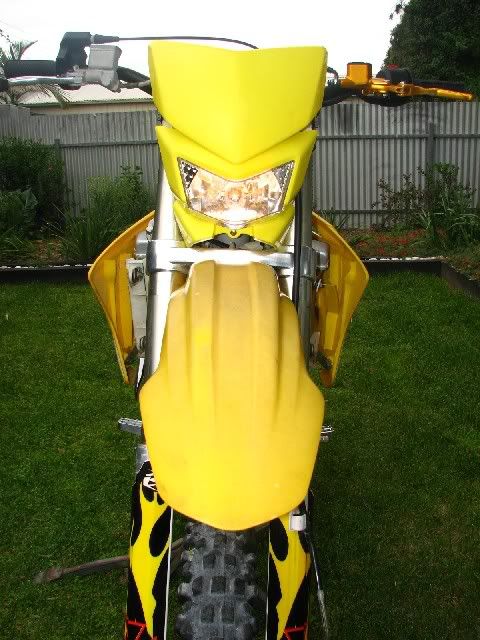
Headlight. This one caused all sorts of foul language. Came with a wiring loom, switchblock with integrated starter and killswitch, and a mounting kit...but no wiring diagram, no mounting instructions.. Still cant for the life of me figure out the mounting kit, which appears to be some sort of slingshot, (???) but the wiring i finally got sorted, after much dicking about, power-testing and other such things. Finally rolled the quad in, parked it alongside the Blitz and copied the wiring. Turns out the wiring loom supplied with the light does four things. It partially replaces the stock loom, it partially splices into the stock loom, it partially requires the standard loom to stay in place to allow the keyswitch and neutral light to work, and finally, it partially makes me drink more beer in the shed and say "F***" a lot. However, once i figure out the wiring, it was all very obvious in the first place, and i could now rewire it very quickly on any of the minis... stupid china wiring and poor wiring information on the net...
Ok, so JR Motorsports made the mistake of quoting all prices in USD when the Aussie dollar went north recently, so i made "one or two" purchases to take advantage of the cheap prices...
For the grand total of $177, which INCLUDED postage to my door, I scored the following items...
Billet CNC "Grubscrew" footpegs.
"Poo-Taper" bars.
Oversized bar clamps, Black CNC Billet.
Two 1/8 turn black Billet throttles.
Headlight.
Red and Gold fuel caps.
Hydraulic clutch in Gold.
ASV copy levers also in Gold.
All in all, pretty good score i reckon. Ebay, take a bow, we thank you.
Ok, so here's the pics and a brief description if they weren't literally a bolt-on item.
Footpegs. Different backing to the stock Atomik crappy cast ones. Required a small square of 6mm flat plate steel to be welded into the peg mount, to "raise" the angle of the pegs, as with the standard set up, they were droopier than ****s in a National Geographic magazine. 6mm plate welded in, they sit up just higher than horizontal. Driveway testing reveals them to be grabbier than a drunk 16 year old in a strip club.

Poo-Taper bars and CNC Billet bar clamps.
Bolted straight into the YZF400 triple clamp i'm running. No issues with fitment.

1/8 turn Billet throttle.
This one caused a few headaches, but required a simple fix. the stock Blitz throttle cable is ok with a 1/4 turn throttle, not a 1/8 though... simply pulled the throttle apart, and using my bench grinder took a little bit of alloy off of the throttle stop.. allowed the throttle to "close" further, (rotate forwards) thus allowing a bit more freeplay in the cable. Idle back down under 4000rpm once done...

Headlight. This one caused all sorts of foul language. Came with a wiring loom, switchblock with integrated starter and killswitch, and a mounting kit...but no wiring diagram, no mounting instructions.. Still cant for the life of me figure out the mounting kit, which appears to be some sort of slingshot, (???) but the wiring i finally got sorted, after much dicking about, power-testing and other such things. Finally rolled the quad in, parked it alongside the Blitz and copied the wiring. Turns out the wiring loom supplied with the light does four things. It partially replaces the stock loom, it partially splices into the stock loom, it partially requires the standard loom to stay in place to allow the keyswitch and neutral light to work, and finally, it partially makes me drink more beer in the shed and say "F***" a lot. However, once i figure out the wiring, it was all very obvious in the first place, and i could now rewire it very quickly on any of the minis... stupid china wiring and poor wiring information on the net...

BlitzKrieg V2.0... Bling that F****r up!!! Cont'd...
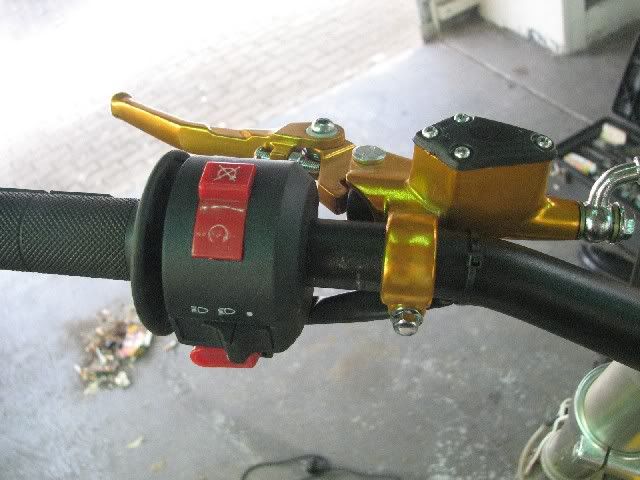
I also tidied up all the wiring loom, and routed it a little differently to keep it away from everything.... (Also found a better way to mount the airfilter, so it isnt rubbing on the frame. Only works with an angled filter, and only needed to be rotated a bit..)
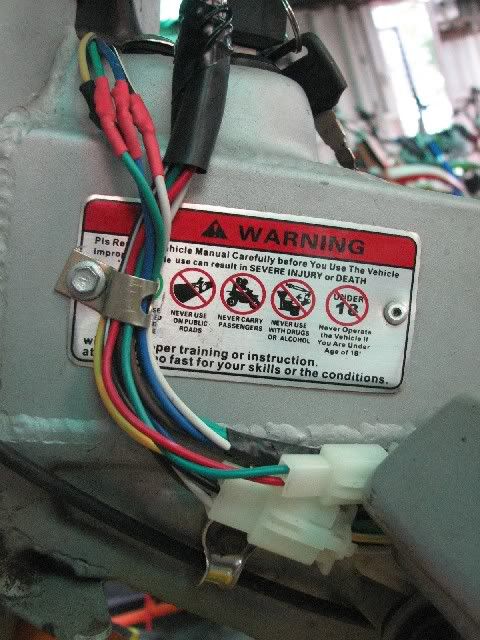
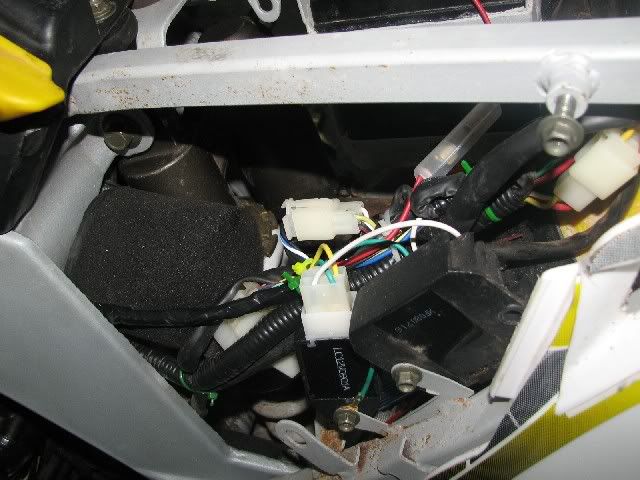
Fuel cap can be seen in the Handlebar photo.
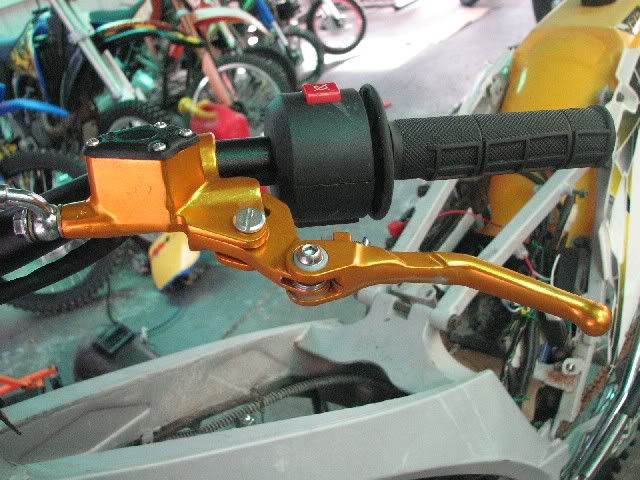
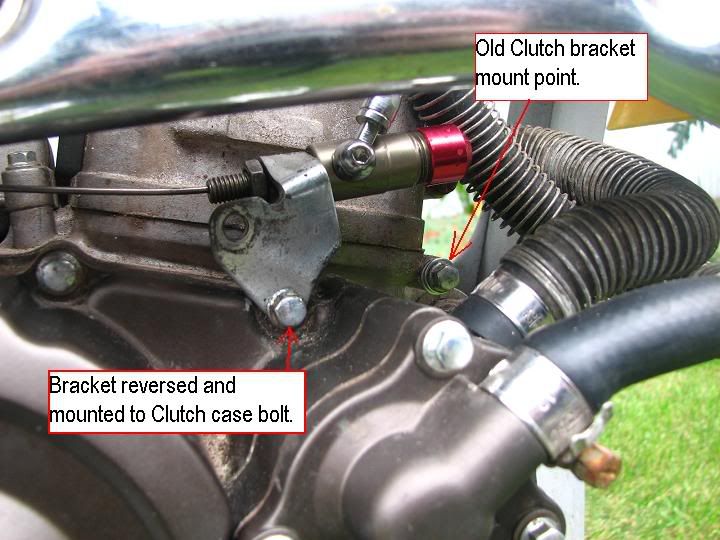
Hydraulic clutch. At first, this caused a heap of isses.. first it took a few goes to find a route from the bars to the clutch mount, that allowed the bars to turn lock to lock, as this clutch is designed for minis, not big bikes, and thus has a relatively short cable..
Once a route was found, i bolted it on, reassembled the bike, only to find it pulled the clutch in waaaay past it's disengagement point, and could not be adjusted out.
The simple fix, was to move the clutch cable mount on the engine cases, to the "next bolt along" on the engine, thus moving the clutch slave cylinder closer to the clutch actuating arm... see pic below to see where i mean...
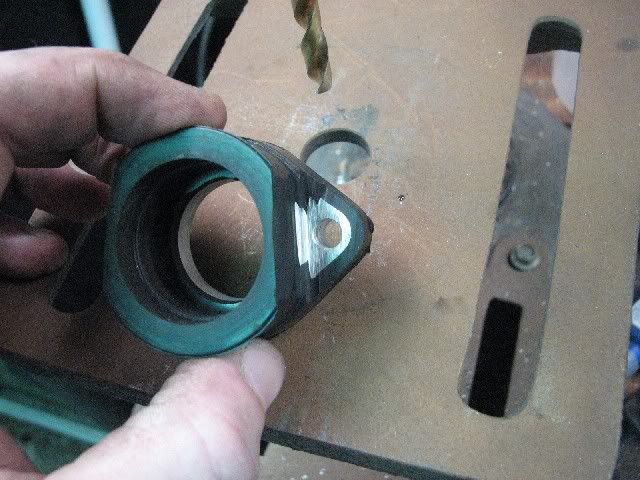
I also replaced the perished OKO flatslide manifold adaptor, which was the "old" style adaptor. the new ones cannot be used on the Blitz manifold, without some modding with the angle grinder... you have to cut the "tops" of the bolt holes off, then drill through the bolt holes...

I also tidied up all the wiring loom, and routed it a little differently to keep it away from everything.... (Also found a better way to mount the airfilter, so it isnt rubbing on the frame. Only works with an angled filter, and only needed to be rotated a bit..)


Fuel cap can be seen in the Handlebar photo.
Hydraulic clutch. At first, this caused a heap of isses.. first it took a few goes to find a route from the bars to the clutch mount, that allowed the bars to turn lock to lock, as this clutch is designed for minis, not big bikes, and thus has a relatively short cable..
Once a route was found, i bolted it on, reassembled the bike, only to find it pulled the clutch in waaaay past it's disengagement point, and could not be adjusted out.
The simple fix, was to move the clutch cable mount on the engine cases, to the "next bolt along" on the engine, thus moving the clutch slave cylinder closer to the clutch actuating arm... see pic below to see where i mean...


I also replaced the perished OKO flatslide manifold adaptor, which was the "old" style adaptor. the new ones cannot be used on the Blitz manifold, without some modding with the angle grinder... you have to cut the "tops" of the bolt holes off, then drill through the bolt holes...

BlitzKrieg V2.0... Bling that F****r up!!! Cont'd...
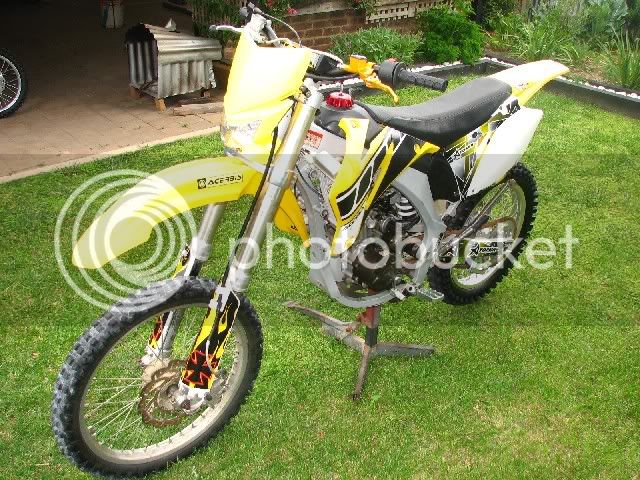
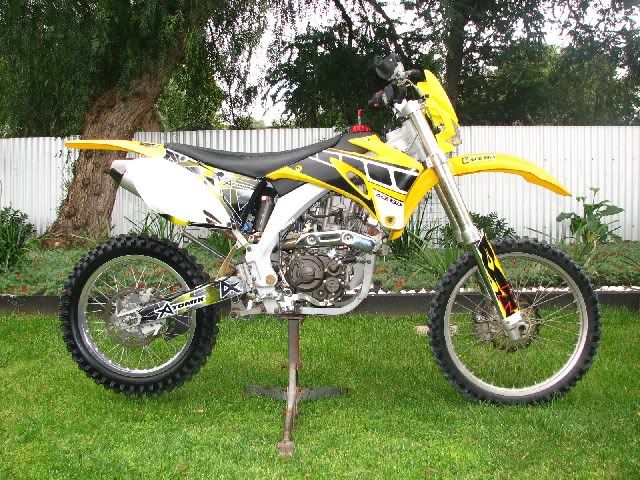
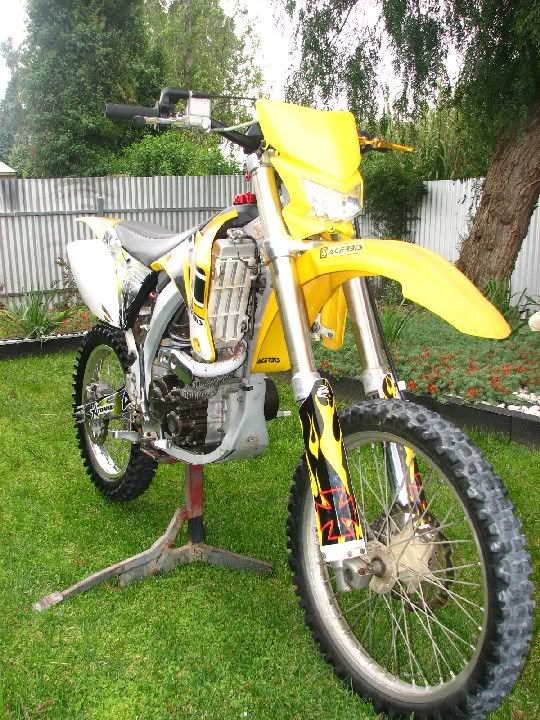
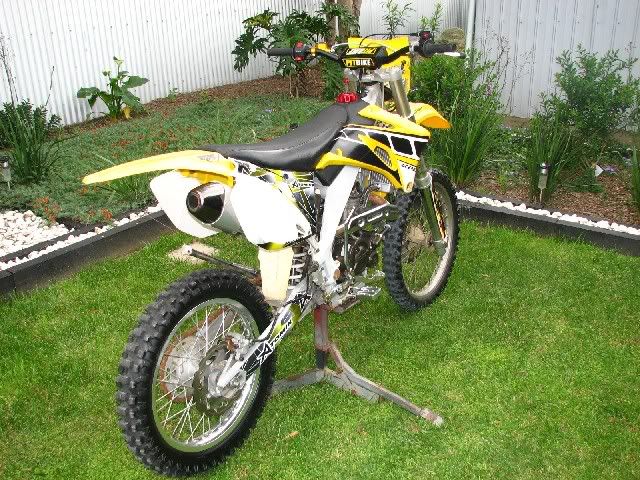
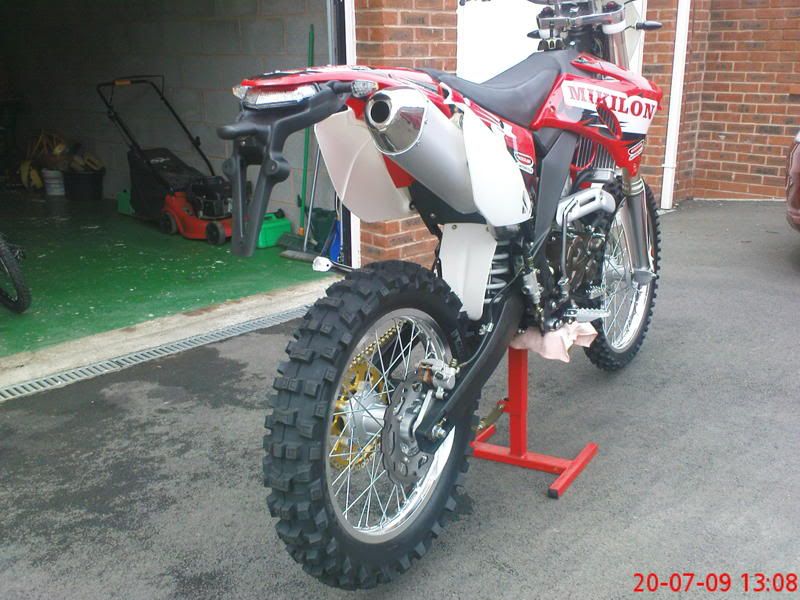
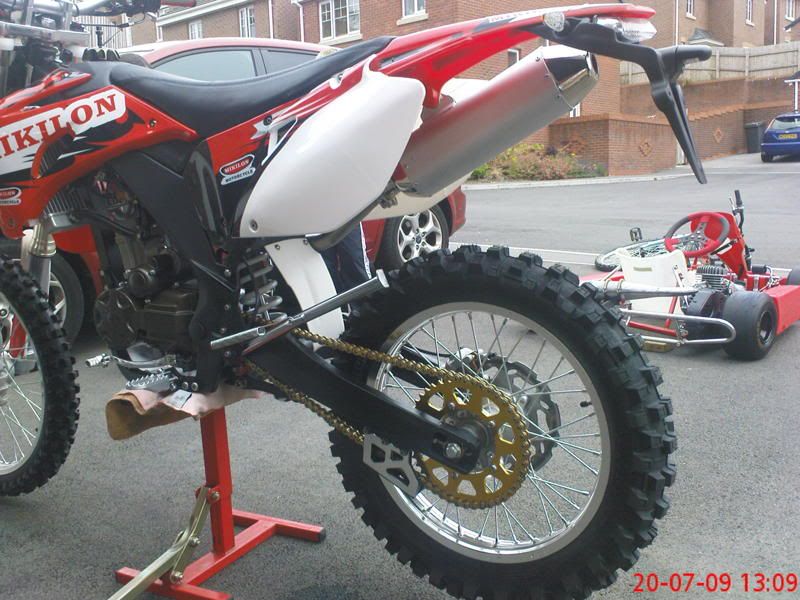
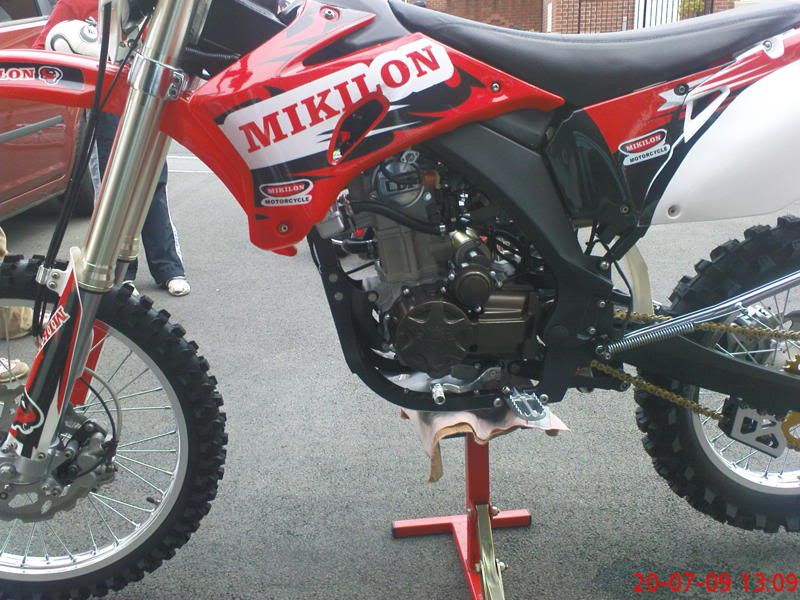
Overall, I reckon my Blitz is really starting to take shape in the looks department. The Yamaha plastics and graphics kit make it stand out a bit, even amongst other yammies when people notice the old Atomik stickers, the sidestand and motor that looks nothing like a YZF plant...
The latest bolt-ons pretty it up a bit, and whilst beauty is in the eye of the beholder, i reckon the latest bit of damage i did on ebay, has made the bike look quite a bit better.
The headlight is going to improve my riding trips, as i wont have to "rush home" before dark on the longer rides, the hydraulic clutch lightened up the clutch pull and action, the pegs are already less droopy, and heaps grippier than the stockers, the new bars have introduced a bit of "flex" to the cockpit, saving the jarring on the body, and the 1/8 turn gets the OKO up and open, and the motor revving it's tits off VERY quickly.
The final piece of the puzzle remains the rear shock replacement... I've lined up with a local wrecker to wheel my bike in, pull the shock out, and start installing shocks he has laying about, until i find one that fits, has the right actual shaft travel, right mounts, and most importantly, the right reservoir height. This has so far been the only stumbling block, as the pipe severely limits shock choices.. yes i could notch the frame and custom bend the pipe, but i want this to be as "Bolt-on" as possible... rather than custom fabricated.. I have a YZF426 rear linkage on it's way (supposedly) that i scored off ebay for the grand total of $2... probably why the dude hasnt sent it... but hopefully, having a "normal" rear shock eye, will open up a few more shock options... That Ohlins is looking more and more feasible all the time...


argh so thats wat u ment by modifying the oko manifold adaptor, wen mentioned earlier in here i took it the other way lol, i ended up drilling out the thread in the blitz manifold and cutting slots in the side, so my bolts screwed into the oko adaptor.
liking the idea of the hydraulic clutch, off to search for one i think
overall thats a dam good looking blitz, with more bling than ice cubes neck wear
liking the idea of the hydraulic clutch, off to search for one i think
overall thats a dam good looking blitz, with more bling than ice cubes neck wear
$150.99
For ATV Dirt Bike Scooter 49CC 2-Stroke Mini Complete Engine Motor With Gear Box
Eddie kaora

$17.59
$19.76
BBB Cycling BBL-52 MiniSafe Compact Bicycle Lock for Mountain, Road and Racing Bikes
Amazon Global Store UK

$11.18
$13.98
Arltb Cycling Gloves for Men and Women Mountain Bike Gloves for Bike Riding Mountain Bicycle Dirtbike Motorcycle BMX MTB Motocross Racing
JBM international
yeah if i'd replaced the adaptor back then, i'd have put pics up. either way, it sounds like you've got yours sussed... The only things i've got remaining with mine, are the rear shock, and getting those FRIGGING BEARINGS out of the hub, and throwing YZF ones in, and then i can run the 310mm rotor and offset caliper from the Blitz original gear... 
Then work may start in earnest on the miniblitz.
Cheers for the feedback on the bling too, accessorizing can be very much hit or miss.
Then work may start in earnest on the miniblitz.
Cheers for the feedback on the bling too, accessorizing can be very much hit or miss.
pbk
Well-Known Member
hey mate its looking good.....
yer i had to the same with my 1/8 turn though i got a differnt one to you form dhz mind you i had to take a bit of the block and grind away a bit on the housing as the knobby bit of the cable would get caught on it
and yes the 1/8 turn helps the oko wind up very fast...
now for you to find a cam and piston and obviously with the cam HD valve springs which will probly lead to HD clutch springs...Now with all your new shizz on it i wanna see another blitz action video on its way
great job thump
cheers mate, yeah sounds like an inherit problem with the 1/8 turn throttles. had the same problem with the cable end catching, ended up kinking the cable a tiny bit, keeps it where it should be. Not sure if i'll go bumping the compression, i'm not sure the cooling system would handle the extra heat, which would mean bigger radiators.. (actually have some YZF450 radiators coming for it though, so that kinda defeats my last comment...)
Definately looking at a cam regrind though, if i can find a replacement stock cam... that way if i stuff it up, i still have a running motor... And yeah, if i go chasing more power, HD clutch springs will go in just as a precautionary measure... havent had any problems yet... waiting to hear on sprocket conversion, so i can gear it up a bit as well...
Definately looking at a cam regrind though, if i can find a replacement stock cam... that way if i stuff it up, i still have a running motor... And yeah, if i go chasing more power, HD clutch springs will go in just as a precautionary measure... havent had any problems yet... waiting to hear on sprocket conversion, so i can gear it up a bit as well...
ok found another bike looking alot like the blitz and claims to have a 7.2ltr fuel tank, just curious if anybody else got a tank this big with there blitz(as we hav found there seems to be a few lil differences between blitz's). think mine is 5 or 6ltr, not really sure until i drain the fuel and fill it up from empty.
250CC Water Cooled Yamaha Copy Racing Bike - Zhejiang East Sporting Products Co.,Ltd
250CC Water Cooled Yamaha Copy Racing Bike - Zhejiang East Sporting Products Co.,Ltd
yeah that's the "other" version of the M96... So far i've found three different versions with the liquid cooled Gen III Loncin motor.. DMX (Atomik under a different banner) did an aircooled version with better suspension and a Gen II aircolled motor a couple of years back, but to my knowledge there is the Atomik Blitz, The Bull 250, and the Mikilon M96, which is the "original" version...
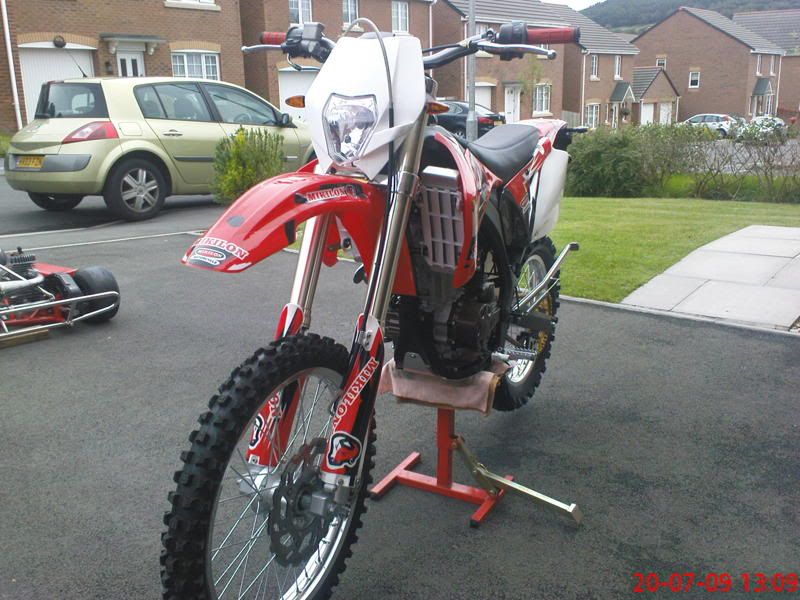
Retrac sent me some pics of his, seems the Lucky Limeys get quite a spiffy looking road registerable version. From what i gather, it's the best of both the Kuda Pro and the Blitz... Or in other words, a Blitz with the Kuda Pro road gear... It's EXACTLY the sort of bike that would go well over here, even if it meant adding another $500-$800 to the price tag, if it meant that magical compliance plate... Yeah, it's still a trail bike with the downfalls of the Blitz, but it's a damn site better looking than any other 250cc trailbike available, and the roadgoing gear looks very minimalistic... less to break in a tumble... And when was the last time you saw a Digital dash on a XR or TTR250??
Still a China, but a damn good looking one with a lot of good features... Pity no one will do the ADR compliance for them here... would definately be a market for a budget trailbike that's registerable...


randomjesso
New Member
- Joined
- Oct 26, 2009
- Messages
- 2
- Reaction score
- 0
Hi, I'm new to the forum and have been checking out these bikes since about 8 months ago. I visited the atomik site the other day and noticed now that the blitz has the GEN 2 water cooled motors instead of the GEN 3, does anyone have any idea why they changed and does anyone have one of these or know what the difference is?
hi randomjesso, i must say i never noticed it was advertised as the gen 2, i brought mine about 6 weeks ago and definatly got the gen 3, we hav found that the atomik specs page for the blitz dosnt alway print the correct info, e.g. max speed 150+km's and max fork travel 200mm, both are incorrect. Fork travel that we hav found here ranges from 265mm and 305mm max and as for the top speed with stock gearing, i think i read earlier in this thread was around 90km.
maybe send them an e-mail - [email protected]
or give em a ring - (03) 9791 8811
just to make sure wat ur buying ( if u intend to) is a gen 3 loncin.
As to wat the differences between the gen 2 and gen 3 water cooled loncin are.. im not too sure myself.
maybe send them an e-mail - [email protected]
or give em a ring - (03) 9791 8811
just to make sure wat ur buying ( if u intend to) is a gen 3 loncin.
As to wat the differences between the gen 2 and gen 3 water cooled loncin are.. im not too sure myself.
Last edited:
Gen II Loncin is air cooled, SOHC 249cc motor. Gen III Loncin is liquid cooled...
Randomjesso, if you want proper specs, ask in here, i'll post up the details for anything you want to know. except HP ratings, cause they ******** when it comes to outright HP, and i havent had mine dynoed yet...
Oh and Synergy, if you happen to be taking the tank on and off yours, keep an eye on the fuel lines... found out the hard way on the weekend, if you dont have the fuel line making a gradual downhill loop from the tank to the carby, it runs lean, backfires heaps, and makes the motor run REALLY hot... also gives off symptoms of running very lean jetting specs... different fuel line routing made the difference between a motor that wouldnt idle, and would boil coolant in under a minute, to a motor that will idle forever.... Fuel starvation being the direct cause...
Atomik drew
Active Member
I'm making the all important OKO26mm carby purchase today. Just need to know if I need any adaptor for fittment. I.e engine to carby manifold or carby to filter manifold?? Cheers
randomjesso
New Member
- Joined
- Oct 26, 2009
- Messages
- 2
- Reaction score
- 0
Hey guys, a bit off the subject of blitz's, but want to know if anyone knows any good mods for the gen 2 zonger motor, i got a xmoto xb31 250 and compared to other bikes with similar engines that ive ridden (atomik proX 250) its ****, wont get the front of the ground in first gear!! Theres gotta be some bolt on mods i can try. Also all my shocks are fried, front and back, (tried doing big boy jumps) any suggestions for different brands, maybe some japs that will fit??
Thought this would be the best place to ask, Thanks
Thought this would be the best place to ask, Thanks
I'm making the all important OKO26mm carby purchase today. Just need to know if I need any adaptor for fittment. I.e engine to carby manifold or carby to filter manifold?? Cheers
make sure u ask for the 'angled air filter' like the one in thump*140's pic a few pages back, otherwise u hav to make an adapter to fit the other type of air filter, which is a pain, as i found out.


![LISEN Bike Phone Holder, [2025 Upgrade] Motorcycle Phone Mount, Bicycle Phone Holder, Handlebar Phone Mount, Dirt Bike Accessories, Bicycle Accessories, Gifts for Men for iPhone 4.7-7" Phone, Black](https://m.media-amazon.com/images/I/41FJGrZQ5ML._SL500_.jpg)


![Bike Phone Mount Holder, [Camera Friendly] Motorcycle Phone Mount for Electric Scooter, Mountain, Dirt Bike and Motorcycle - 360° Rotate Suitable for iPhone & Android Smartphones from 4.5-7.0 inches](https://m.media-amazon.com/images/I/51ZirRrsA+L._SL500_.jpg)


