v2 head covers???

Mini Dirt Bikes & Pit Bikes Forum

Help Support Mini Dirt Bikes & Pit Bikes Forum:

This site may earn a commission from merchant affiliate links, including eBay, Amazon, and others.
I aint any good at doing reviews or getting into all the technical talk but I could have a few pointer for you with fitting the head. I have learnt a few little bits n pieces already that no one on here as mention as yet. Ming'n did me on tuesday mate. i wont walk into that place again in my life.

yea and wat are the pointers??... so your v2 didnt come with gaskets or cam cover or valve covers??
 
and stay away from the REV there...lets just say im almost positive its been test ridden.

you could say its second hand now..
 
and stay away from the REV there...lets just say im almost positive its been test ridden.

you could say its second hand now..

I cant say its been test ridden but it has the scratches on the frame where ya feet go. It looks second hand.Its one of the first shipment of bikes that Revolution advertised on here for $1800 and yes it still has the leaky fuel cap. So saying that it may not of been ridden. And it is for sale for a nice fat price of $2100 because its assembled.lol.
 
yea and wat are the pointers??... so your v2 didnt come with gaskets or cam cover or valve covers??

The 2 screws on the cam retaining plate are very tight. I got mine with a Big screw driver and a few little knocks with the hammer but as suggested early by a member use a impact driver for sure.
The screws dont come with the new head and cam but a new retaining plate does but my original screws didnt seem to fit on the TB plate very well at all.My screws and plate are tapered to flush mout the screws where as the plate supplied with the head is flat around the screw hole.Not sure what to do about it yet.
The 2 pins that hold the rockers in must be lubed before installing or it makes it hard to get them into the correct postion as they have cut outs in them that the retaining plate fits into. Thats all I have for now.
 
you need yx/klx110 style covers. the 155z covers dont fit. ill get pics up this afternoon if i can work out this photo sharing bit
 
Yeah, it came with all the o rings and gaskets but the o rings were stuck into the plastic cover, my guess is when they heat srunck the kit onto the cardboard it heated up the rubber to much and it stuck to the plastic wrapping, but the orings were the right size but thry were to thin to make a seal for the cam cover.
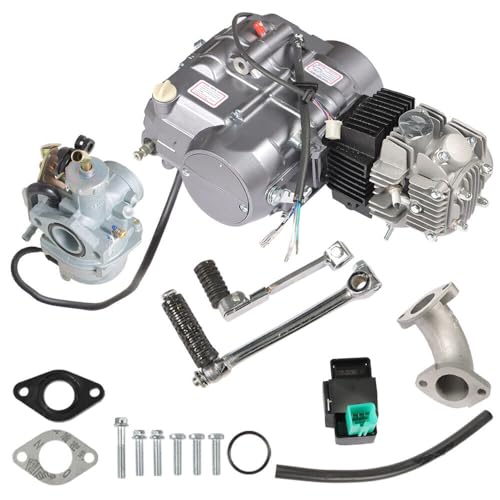
Yeah, it would be good idea to invest in some new cam retaining bolts, the stock head are countersunk if I recall and the V2 are flush, they will work but it wont be 100%, you have just dropped $500 on the kit so why not jsut finish it off.
Just lube/oil everthing completly when putting it in, then oil some more.
Cam in first, then rocker arm pins and rocker arms, then the bolts in the end on the rocker arms and set the clearance there and then while its on the bench.
Piston rings can be tricky, you will be able to the difference beteen them all. oil top ring on first then the ruffles oil ring then the bottom oil ring all from the bottom, them middle ring then top ring.
One not with rings, be patient and take extra care not to twist the rings. They will open a fair bit while they are flat, more than enough to slip over the piston without touching it. They will try to twist and buckle, so use all your fingers or the ring opener tool if you have one [not neccessary but nice] never use anythign hard or sharp near the piston or its rings.
When putting the barrel over the piston, use lots n lots of oil, dry rings and dry bore = nasty mess and short life.
Just oil everything, and then oil again. even the top of the piston to be sure, you can always wipe it off once you have the barrel on.
 
oil top ring on first then the ruffles oil ring then the bottom oil ring all from the bottom

you do this the very way not to do it....

the center oil ring goes first then 1 thin oil ring each side starting from the bottom but fitting from the top of the piston.

dont fit rings from the bottom of the piston up this is the largest part of the piston and has a greater chance to bend rings or mark the piston skirt..
the top part of the piston from the oil ring up is machined smaller..

and to clarify the rings if there not marked..
chrome ring in top groove cast ring in second groove..
any numbers or marks on the rings near the ring gaps face the the top of the piston..

also be sure to space the ring gaps 180 degree's from each other..

but as i said earlier... check my thread out it has all this info plus more..

and the zonger engine shouldnt have counter sunk cam retaining bolts. same bolts should be able to be used...
 
Yeah, my bad. When I was doing it, I was shown to do it from the bottom for the oil ring only.
But Sean you are the man when it comes to this kind of stuff, so I'll do it your way next time and so should everyone else.
 
lol, not sure how to take that post....

but it comes down to what your taught. and in all the years of being an engine re-conditioner i never heard of rings going on that way..

you continue to do it your way if it works, but i can see someone doing it for the first time having a massive fail..
 
Take in a +reps way. I'd prefer to take advise from someone who deos it day in day out than someone who has only done it a handfull of time.

All rings from the top is the 1 thing I have learnt for today.
 
i actually think that would be a good thread to make sean

a thread how to properly put on piston rings cos i have no idea how to do it all pistons i have put in have already had the rings on it
 
The screws on my cam retaining plate are definatly designed to be counter sunk. They fit onto the tb plate but dont go into the plate as far. Hopefully they work.
Quick question sean. How do I know the cam is installed in the correct position?
 
the retaining bolts im referring to are the actual cam gear bolts. so i guess i didnt understand which we were speaking about..

you must have 2 threads going regarding this v2 head..
i thought i posted a link to my engine build up thread in here but must of been the other..

so here it is again, its not for the v2 head but same principle applies for assembly http://www.miniriders.com.au/motor-tutorials/28151-yx150-160-155z-top-end-build-up-magneto-mod.html i might actually put it in my sig too :)

and pbk read that i think there is enough info in there
 
nah mate I only have 1 thread goin. The 2 screws im refering to are in the camshaft retaining plate.
I read your article and it was very helpful thanks. the one thing I couldnt quiet grasp was you say face the 2 lobes towards the chamber. I think I understand but to me it seems the lobes are at opposite sides of the cam.

it really does'nt matter about the screws and plate not being countersunk as long as it holds the plate in firm and stop the rockers pins coming out, you can even swap them out for different bolts allan key head as long as they clear the cam gear and chain.
 
what i meant about the cam lobes is when the cam is installed in the correct location both lobes will be pointing the head. (or base of each valve spring)

if its in the wrong location they will be pointing the front wheel so to speak..

to put it another way...cam installed, rockers installed.. if the valves are on the rock then you have it 180 out

if your still stumped then let me know and ill whip up a pic or something.
 
Thanks very much sean for you help. your article helped me out heaps.Im an expert now.lol.
I got it running today. Was a bit of a pain to start. Cant believe how much the v2 head changes how the bike kicks over.I can see how kick starter gears break. I gotta learn a technique and fast or these kick starter gears will be smashed to pieces.
I rode the bike around for a while slowly then double checked things then i opened up the throttle a bit. I cant really think of words to describe how good it goes. The only words i can think of is front wheel off the ground most gears. Back wheel breaking traction all gears. Yard looks like a thousand bikes have been riding around it. WOW
 
ITs awesome to hear that your so Happy with the V2. I know I was, but I have to learn to rise all over again as I changes everything on the bike!
 
Did you get the s35 type cam ? it bleeds off most of the compression.
i couldn't remember much of a change in compression etc from stock after putting mine on.

and congrats you didnt fudge up anything! i love when it all goes smooth lol
 

Latest posts

Back
Top